FTC Disclosure: This article contains affiliate links to products on Amazon. As an Amazon Associate, Kore Komfort Solutions earns from qualifying purchases at no additional cost to you. We only recommend products we believe will be helpful for your home improvement projects.
Article Navigation
- Introduction: A Wheelersburg Kitchen Success Story
- The Facebook Marketplace Opportunity
- Planning Your Kitchen Transformation
- Pre-Construction Preparation
- Demolition and What We Found
- Addressing Structural Issues
- Coordinating Mechanical Systems Updates
- Drywall Installation and Finishing
- Cabinet Installation Process
- Engineered Hardwood Flooring
- Granite Countertop Installation
- Backsplash and Feature Tile
- Ventilation and Appliance Installation
- Budget and Timeline Insights
- Lessons for Your Kitchen Project
- Frequently Asked Questions
Introduction: A Wheelersburg Kitchen Success Story
Between Wheelersburg and South Webster in Scioto County, a beautiful brick ranch home recently underwent a complete kitchen transformation that demonstrates how smart material sourcing, careful planning, and quality craftsmanship can deliver exceptional results. This project showcases the potential of Southern Ohio kitchen remodeling when homeowners combine strategic thinking with skilled execution.
The homeowners discovered a remarkable opportunity on Facebook Marketplace: a complete set of high-quality kitchen cabinets and granite countertops being sold by an out-of-town homeowner who simply wanted a style refresh. The materials weren’t worn or damaged—they were simply being replaced as part of a design update. Recognizing the exceptional value, our clients secured the entire package and embarked on a comprehensive kitchen renovation that would transform their home.
What resulted was a complete kitchen gut and rebuild that addressed not only aesthetics but also underlying structural issues, updated mechanical systems, and created a space that looks completely custom-built. This article walks through every phase of the project, providing insights for Southern Ohio homeowners considering their own kitchen renovations.
Regional Context: Wheelersburg and South Webster are established communities in Scioto County with a mix of mid-century ranch homes and newer construction. Many homes in this area were built during the 1960s-1980s boom and are now prime candidates for kitchen updates as these spaces reach 30-50 years of age.


The Facebook Marketplace Opportunity: Smart Material Sourcing
One of the most significant cost factors in any kitchen remodeling project is cabinetry and countertops. New custom cabinets can easily run $8,000-$25,000 depending on quality and kitchen size, while granite countertops typically cost $40-$100 per square foot installed in the Portsmouth and Scioto County area. This Wheelersburg project demonstrates an alternative approach that’s becoming increasingly popular among savvy homeowners.
Why Quality Materials Get Resold
High-quality kitchen materials often become available secondhand for reasons that have nothing to do with condition or quality. Homeowners undertaking complete remodels sometimes replace perfectly functional materials simply to achieve a new aesthetic. Trends shift from traditional to contemporary, from dark woods to painted finishes, or from one countertop material to another. Properties being flipped or extensively renovated may have serviceable kitchens that don’t match the new vision. Out-of-town sellers may find it more practical to sell materials locally rather than transport them indefinitely.
Evaluating Secondhand Kitchen Materials
When considering pre-owned cabinetry and countertops, examine several critical factors. Inspect cabinet construction quality including joinery methods, drawer slides, and door hardware. Our Kitchen Cabinet Buying Guide for Southern Ohio explains what to look for in quality construction. Indicators include dovetail drawer construction, soft-close hardware, and solid wood face frames. The cabinets in this Wheelersburg project featured all these attributes, making them an excellent investment.
Check granite for chips, cracks, or etching. Professional re-cutting can accommodate different layouts, but significant damage reduces value. These countertops arrived in excellent condition, requiring only professional cutting to fit the new kitchen layout.
Understand that cabinets and counters will likely require modification to fit your space. Budget for professional measuring, potential filler pieces, and countertop fabrication. Factor in transportation, temporary storage if needed, and professional installation. Even with these expenses, quality secondhand materials often cost 40-60% less than new equivalents.
For Southern Ohio homeowners, platforms like Facebook Marketplace, Craigslist, and regional salvage yards offer opportunities to source quality materials. The key is knowing what to look for and having realistic expectations about adaptation requirements.
Planning Your Kitchen Transformation
Success in kitchen remodeling begins long before the first cabinet is removed. This Wheelersburg project required extensive planning to integrate pre-purchased materials into a cohesive design that improved both function and aesthetics.
Measuring and Layout Design
With secondhand materials, the planning process works somewhat in reverse. Rather than designing a dream kitchen and then sourcing materials, you’re adapting available materials to your space while maximizing both function and aesthetics.
Accurate measurements are essential. Use a quality measuring tape to document your existing kitchen including ceiling height, wall dimensions, window and door locations, and positions of electrical, plumbing, and gas lines. In older Scioto County homes, walls aren’t always perfectly square or plumb, so professional verification is valuable.
Create a detailed inventory of acquired cabinets and countertops, including cabinet depths, heights, and configurations. Understanding exactly what you have allows you to visualize potential layouts. Work within the constraints of available materials while improving workflow. The classic kitchen work triangle—the relationship between sink, stove, and refrigerator—should remain a planning priority even when working with pre-owned components.
Scope Definition and Sequencing
This project’s scope extended beyond simple cabinet replacement. The homeowners and contractors identified early that achieving the desired result would require complete removal of existing cabinets, countertops, and flooring, assessment and potential repair of walls and structural elements, electrical system updates for modern lighting and appliances, plumbing modifications, new drywall finishing, installation of new cabinets and countertops, flooring, and backsplash work.
Understanding the full scope from the outset prevented mid-project surprises and allowed for realistic budgeting and scheduling. For comprehensive guidance on planning your kitchen project, review our Complete Guide to Kitchen Remodeling, which covers everything from initial concept through final walkthrough.
Pre-Construction Preparation
Before demolition begins, successful kitchen remodels require thoughtful preparation, especially in occupied homes where the family will live through the renovation.
Creating a Temporary Kitchen
In Southern Ohio ranch homes like this Wheelersburg property, families typically set up temporary cooking and food storage areas in adjacent rooms, basements, or garages. Practical temporary kitchen elements include a microwave and countertop convection oven on a sturdy table, a cooler with ice for perishable storage, portable shelving for dry goods and dishes, and a designated dishwashing station in a bathroom or laundry sink.
Most kitchen renovations in the Portsmouth area require 3-6 weeks for completion, so establishing comfortable temporary arrangements makes the process more manageable.
Protecting Adjacent Spaces
Dust and debris from demolition and construction travel surprisingly far. Protective measures include plastic sheeting barriers at doorways with zipper openings, floor protection along traffic routes, window covering to contain dust during demolition, and HVAC vent covering to prevent dust circulation through the home. Quality plastic sheeting and proper containment save hours of post-project cleaning.
Material Staging and Storage
Pre-purchased cabinets and countertops require protected storage until installation. This Wheelersburg project used the garage for cabinet storage, with care taken to keep materials dry and protected from temperature extremes. Ohio’s humidity and temperature swings can affect wood cabinetry, so climate-controlled or well-ventilated storage is important.
2026 Remodeling Cost Guide
Don’t get ripped off. See real pricing for bathrooms, kitchens, and HVAC.
Updated for 2026 Market Rates
Demolition and What We Found
The transformation began with complete gutting of the existing kitchen. Demolition in older homes consistently reveals issues invisible during initial assessment, and this project proved no exception.
Systematic Removal Process
Professional demolition follows a specific sequence to prevent damage and maximize salvage opportunities. Appliances are disconnected and removed first, creating working space. Wall cabinets come down before base cabinets to prevent damage and improve access. Quality cabinets may have resale or donation value if removed carefully.
Countertops are typically destroyed during removal unless specific care is taken for salvage. In this case, old countertops were simply disposed of since replacement materials were already secured. Lower cabinets are uninstalled, revealing plumbing connections and electrical outlets. Old flooring is removed to subfloor level, allowing assessment of structural conditions beneath. Tile, wallpaper, or other wall treatments are stripped to expose drywall or plaster.
Proper safety equipment is essential during demolition. Safety glasses, dust masks, and heavy work gloves protect against injuries and hazardous materials exposure.
Discovery Phase Findings
Once the kitchen was stripped to studs and subfloor, several issues came to light—a common experience in Southern Ohio homes built during the 1960s-1980s. The opening between the kitchen and front sitting room showed inadequate structural support. The header beam was undersized for the span, creating potential for settling or sagging over time. This is relatively common in ranch homes where later modifications expanded openings beyond original design parameters.
Inspection revealed outdated wiring, insufficient circuit capacity for modern appliances, and outlets that no longer met current code requirements. Original plumbing showed age-appropriate wear, with some connections ready for replacement. The homeowner’s tradesman background proved valuable in addressing these issues efficiently.
The discovery phase reinforces an important principle: always budget 10-15% contingency for unexpected repairs in any kitchen renovation, particularly in homes over 30 years old.
Addressing Structural Issues
The archway structural deficiency required immediate attention before proceeding with finish work. Compromised structural elements left unaddressed can lead to cracking drywall, binding doors, or more serious settling issues over time.
Archway Reinforcement Process
Correcting the archway support involved evaluating the weight being supported by the header beam, including ceiling joists, any upper floor loads, and the wall assembly itself. In single-story ranch construction, loads are typically less demanding than in two-story homes, but proper support remains essential.
Before modifying any structural element, temporary supports must be installed to carry loads during the repair process. This typically involves adjustable jack posts or temporary stud walls. The original header was either replaced with appropriately sized lumber or reinforced with additional members to properly distribute loads across the opening. In Southern Ohio construction, this typically means doubled or tripled 2×10 or 2×12 headers depending on span and load.
The vertical framing members supporting the header were inspected and replaced as needed to ensure solid bearing. Proper use of a digital level ensures accurate installation of structural elements.
Why Structural Integrity Matters
Kitchen renovations often involve removing walls or enlarging openings to create better flow and sightlines. In Scioto County homes, we frequently see walls removed between kitchens and dining rooms, enlarged pass-throughs to adjacent living spaces, and peninsula installations replacing full walls. Each of these modifications affects your home’s structural system.
Working with experienced contractors who recognize structural requirements prevents costly problems and ensures your remodeled kitchen remains stable for decades. Our network includes qualified contractors throughout the Portsmouth and Wheelersburg area who understand both structural requirements and local building codes.
Coordinating Mechanical Systems Updates
One of this project’s strengths was the homeowner’s skilled trades background. He personally handled the plumbing and electrical updates, coordinating closely with the carpentry and finish work to ensure proper sequencing.
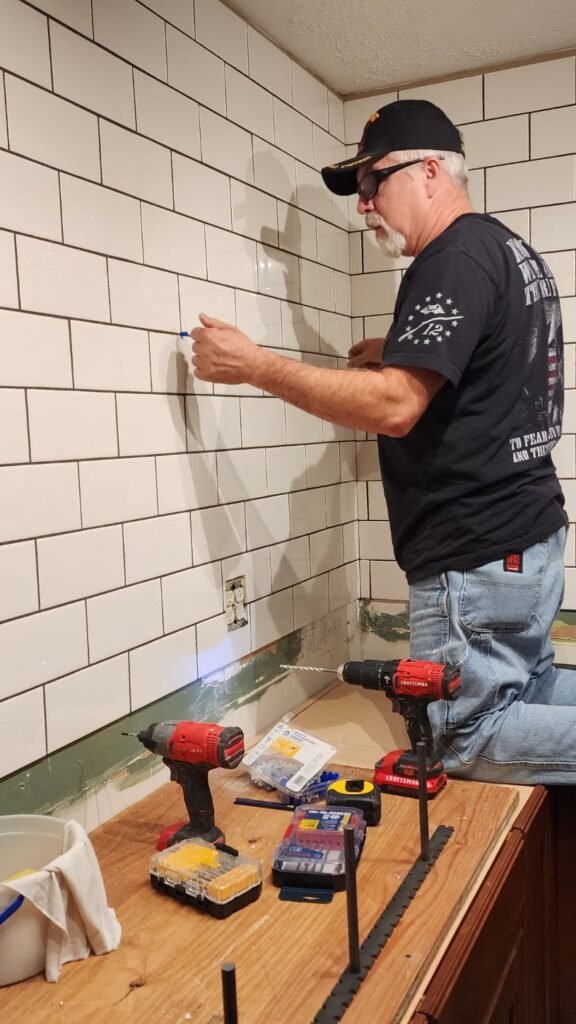
Electrical System Modernization
Modern kitchens demand substantially more electrical capacity than those built 30-50 years ago. Contemporary kitchens typically require dedicated 20-amp circuits for refrigerators, microwaves, dishwashers, and disposal units. Small appliance circuits serve countertop outlets for coffee makers, toasters, and other plug-in devices. This Wheelersburg kitchen received updated circuit distribution to meet current National Electrical Code requirements.
All kitchen countertop outlets must have ground-fault circuit interrupter protection for safety. This prevents electrical shock hazards in areas where water and electricity might mix. Modern LED lighting fixtures were installed to brighten the workspace. Our Kitchen Lighting Design Guide explores strategic lighting approaches including ambient ceiling lighting, under-cabinet task lighting, and accent lighting for visual interest.
Electric ranges, over-the-range microwaves, and range hoods require specific voltage, amperage, and circuit configurations. Professional evaluation ensures compatibility with planned appliances. Quality cordless drills and proper electrical tools make installation work more efficient and safer.
Plumbing Modifications
Kitchen plumbing updates frequently involve supply line replacement, drain reconfiguration, dishwasher and disposal connections, and shutoff valve installation. Older galvanized or copper supply lines may be replaced with modern PEX or updated copper installations offering better longevity and easier future service.
New sink locations require drain line repositioning. In this project, the sink location remained similar to the original, minimizing plumbing complexity. Updated appliances require properly sized supply lines, drain connections, and in the disposal’s case, appropriate electrical connections. Modern plumbing practice includes accessible shutoff valves for each fixture, allowing future service without home-wide water shutdown.
Coordinating Trades and Sequencing
Even when homeowners handle some work themselves, proper sequencing remains critical. This project followed the standard progression: structural work first, then rough-in electrical and plumbing before drywall installation, followed by finish electrical and plumbing after cabinets are installed. This sequencing prevents costly rework and ensures building code compliance.
Drywall Installation and Finishing
With structural repairs completed and mechanical rough-ins finished, attention turned to creating finished wall and ceiling surfaces. Quality drywall work provides the foundation for a professional-looking kitchen renovation.
Drywall Installation in Kitchen Environments
Kitchen drywall faces unique challenges compared to other rooms. Areas behind sinks and near dishwashers benefit from moisture-resistant “green board” or newer mold-resistant drywall products. Southern Ohio’s humidity makes moisture resistance particularly valuable.
Wall areas receiving cabinets need solid backing—either studs or blocking—to support substantial weight. A full upper cabinet loaded with dishes can weigh 200+ pounds, requiring secure attachment points. A quality stud finder helps locate framing members for secure cabinet installation. Windows, doors, and the archway to the sitting room require careful cutting and finishing to create clean, professional lines.
Finishing for Paint-Ready Surfaces
Professional drywall finishing involves multiple steps. All seams between drywall sheets receive paper or fiberglass mesh tape embedded in joint compound. This prevents cracking at seams over time. Professional finish work typically involves three coats of joint compound—initial tape coat, second fill coat, and final skim coat. Each layer is feathered wider than the previous, creating imperceptible transitions.
Between coats and after final application, surfaces are sanded smooth with sanding sponges or blocks. Modern sanding tools with vacuum collection minimize dust, though some fine particulate is inevitable. Before painting, all new drywall receives primer to seal the surface and ensure uniform paint adhesion and appearance.
In this Wheelersburg kitchen, fresh drywall throughout created a clean canvas for the updated design. This approach is typically more cost-effective and better-looking than attempting to patch and blend old and new surfaces, particularly when the entire room is being renovated.
Cabinet Installation Process
The centerpiece of this renovation was the high-quality cabinetry secured through Facebook Marketplace. Professional installation of pre-owned cabinets requires the same attention to detail as new cabinet installation, with additional considerations for adapting to the new space.
Pre-Installation Preparation
Before the first cabinet touched the wall, several preparation steps ensured success. Final measurements confirmed the planned layout would work with available cabinets. Adjustments to spacing, filler pieces, and cabinet positions were finalized.
A level line marked on walls establishes a consistent reference point for upper cabinet installation. Kitchen floors are rarely perfectly level. Base cabinets are then shimmed to match this level plane. All stud locations were marked clearly before installation began. Cabinet installation requires fastening to wall studs, not just drywall.
One last check confirmed electrical outlets, plumbing stub-outs, and gas lines were positioned correctly for the cabinet layout. Making corrections before cabinet installation is infinitely easier than afterward.
Installation Sequence
Professional cabinet installation follows a specific order. Wall cabinets install before base cabinets, providing easier access and preventing damage to base units and countertops during upper installation. Cabinets are typically hung on a temporary ledger board to support weight during installation.
Lower cabinets are positioned, leveled with shims, and fastened securely. Cabinet faces are aligned carefully—even slight misalignment is noticeable once doors are mounted. Freestanding elements like islands or peninsulas are positioned and secured, often requiring floor attachment and careful leveling. Gaps between cabinets and walls, or between cabinet units, are covered with matching filler strips for a custom, built-in appearance.
Adapting Pre-Owned Cabinets
Working with secondhand materials requires flexibility and problem-solving. The original kitchen and this Wheelersburg kitchen differed slightly in dimensions. Careful planning allowed the cabinets to fit beautifully through strategic use of filler strips and slight spacing adjustments.
Door and drawer pulls were verified for consistency. If the homeowners wanted to update hardware, installation time is ideal, as drilling new holes after installation is more difficult. Quality cabinet pulls and handles can dramatically update the appearance of cabinets. Minor scuffs or imperfections from removal and transport were addressed with touch-up markers before installation.
The result? Cabinetry that looks completely custom-built and new. Visitors to this Wheelersburg home are genuinely surprised to learn the beautiful cabinets came from another kitchen, testament to both the quality of the materials and the precision of installation.
Engineered Hardwood Flooring Installation
The flooring selection—engineered hardwood—represents an excellent choice for Southern Ohio kitchens, balancing the beauty of real wood with enhanced stability and moisture resistance.
Why Engineered Hardwood Works for Kitchens
Traditional solid hardwood can be problematic in kitchens due to moisture exposure and potential water events. Engineered hardwood addresses these concerns through its layered construction—a real wood veneer over plywood or composite core—which resists expansion and contraction from humidity changes better than solid wood. This matters in the Ohio Valley, where humidity swings from winter’s dry indoor air to summer’s 70-80% outdoor humidity.
While no wood floor should be subjected to standing water, engineered products handle incidental splashes and damp mopping better than solid hardwood. Engineered flooring can be glued, nailed, or installed as floating floor systems depending on substrate conditions and project requirements.
With real wood veneer on the surface, engineered flooring looks identical to solid hardwood and can be refinished, though fewer times than solid wood due to thinner wear layer. For a comprehensive comparison of all kitchen flooring options, see our Kitchen Flooring Options and Costs in Southern Ohio guide.
Installation Process
The flooring installation followed cabinet placement, proceeding in several stages. The existing plywood subfloor was inspected for levelness, damage, and squeaks. Any issues were corrected before flooring installation began.
Depending on installation method, appropriate underlayment was installed to provide cushioning, minor leveling, and moisture barrier properties. Flooring was planned to run in a visually appealing direction, typically parallel to the longest wall or in the primary sight line. This planning prevents awkward narrow pieces at room edges.
Boards were installed systematically, with joints staggered in a random pattern that mimics traditional hardwood installation. Edges maintain proper expansion gaps (typically 1/4-1/2 inch) around all perimeter walls to allow for seasonal movement. Where the kitchen flooring meets adjacent room flooring, appropriate transition strips create clean, professional boundaries while accommodating different floor heights or materials.
Seamless Flow Throughout the Space
Running consistent flooring throughout the kitchen and into adjacent areas creates visual continuity and makes spaces feel larger and more cohesive. This is particularly effective in ranch homes like this Wheelersburg property, where open sight lines and connected spaces benefit from unified flooring.
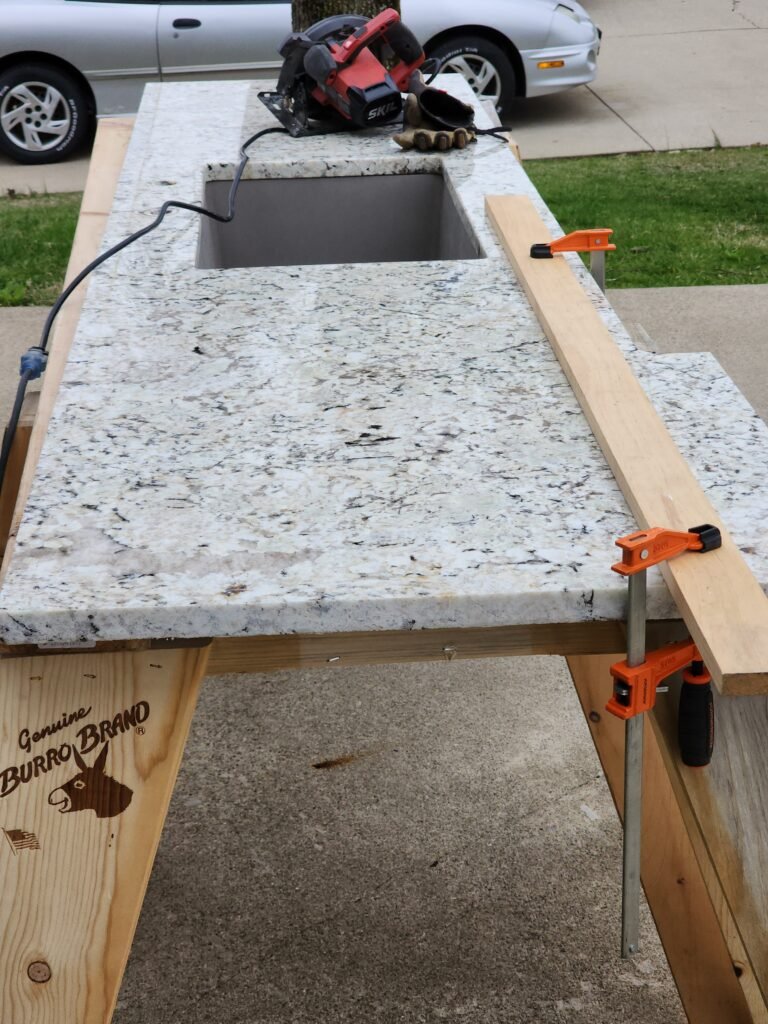
Granite Countertop Fabrication and Installation
Like the cabinets, the granite countertops came from the Facebook Marketplace purchase. However, even identical granite requires professional cutting and fitting to accommodate a different kitchen layout.
From Slab to Installed Countertop
Granite countertop installation is specialized work requiring specific tools and expertise. With cabinets installed and level, fabricators create precise templates of the countertop areas. These templates account for sink cutouts, cooktop openings, edge overhangs, and any seams required for large kitchen layouts. In modern practice, many fabricators use laser measuring systems for exceptional accuracy.
In the shop, granite slabs are cut using diamond blade saws capable of cutting through this incredibly hard natural stone. Sink and cooktop cutouts are made using specialized tools. Edges receive the specified profile—whether simple eased edge, beveled, bullnose, or more elaborate ogee profiles.
When single slabs can’t cover the entire counter area, seams are carefully planned at structurally sound locations and ideally positioned where they’ll be less visible—often aligned with the cooktop or sink, or near wall corners.
Granite is extremely heavy—approximately 18-20 pounds per square foot for standard 3cm thickness. Careful transportation and handling prevents cracking. Installation involves setting pieces precisely on the cabinets, ensuring level, and bonding to the cabinet structure. After installation, granite receives appropriate sealant to protect against staining. While granite is quite stain-resistant naturally, sealing provides additional protection, particularly important in kitchens where oils, wine, and acidic foods are common.
Adapting to a New Layout
The granite from this Wheelersburg project’s Facebook Marketplace purchase required re-cutting to fit the new kitchen dimensions. This involved new measurements for the updated cabinet configuration, re-cutting sink openings to match the new sink location and model, creating different edge profiles if the homeowners wanted a change from the original, and potentially different seam locations depending on layout changes.
Professional fabrication ensured the reconfigured granite looked completely custom despite its secondhand origin. This represents a significant cost savings—new granite materials and fabrication in the Portsmouth area typically run $40-$100 per square foot installed, while repurposing existing slabs reduced costs to primarily fabrication and installation labor.
Granite Performance in Ohio Valley Kitchens
Granite remains popular in Southern Ohio for good reasons. It’s extremely hard and scratch-resistant, ideal for busy kitchens. Hot pots won’t damage granite surfaces. Natural stone provides unique character and visual depth. Quality granite adds resale value to homes. With minimal care, granite countertops last decades without needing replacement.
For detailed comparisons between granite and other popular countertop materials, see our guides on Granite vs. Quartz Countertops and our comprehensive Kitchen Countertop Materials Comparison.
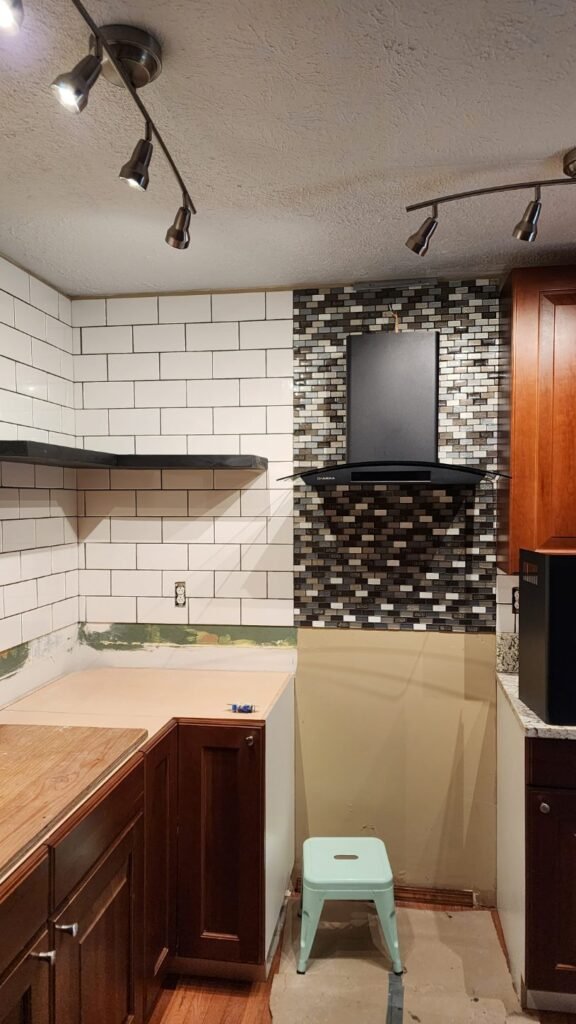
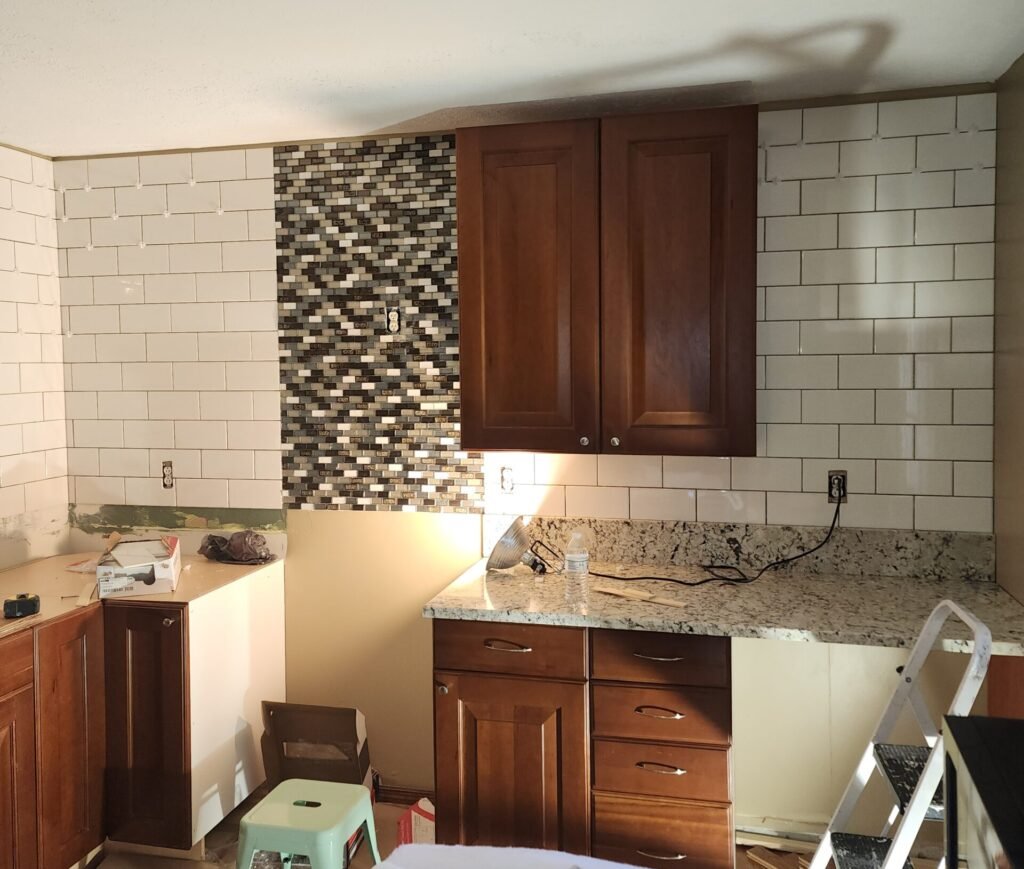
Backsplash and Feature Tile Work
With cabinets and countertops installed, tile work added both protection and visual interest. This project included two distinct tile elements: a practical subway tile backsplash and an upscale feature tile behind the stove.
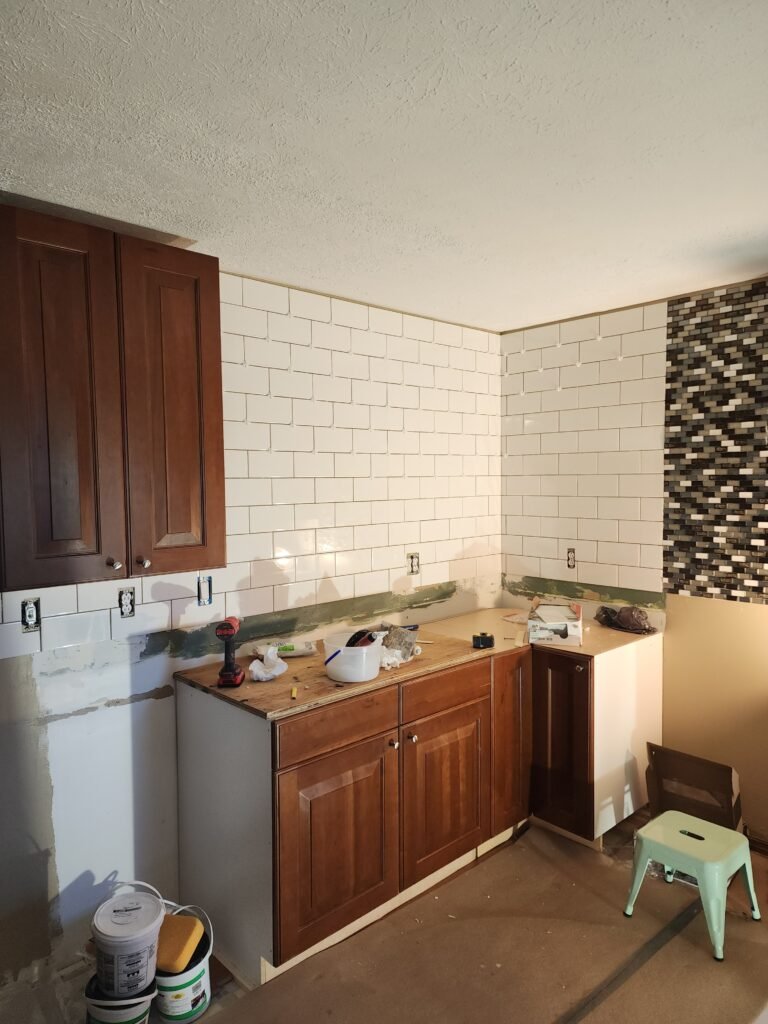
Subway Tile Backsplash
Classic subway tile—typically 3×6 inch rectangular tiles—remains popular in kitchen design for good reasons. Originally popularized in early 20th century New York subway stations, this pattern has proven its lasting appeal through decades of changing design trends. Subway tile works with virtually any cabinet and countertop combination, complementing both traditional and contemporary design directions.
Tile backsplashes protect walls from water splashes, grease spatter, and food stains. Regular wiping keeps them looking new indefinitely. The running bond pattern (each tile centered over the joint of the row below) creates pleasant horizontal lines that make kitchens feel wider.
Stove Feature Tile
Behind the stove, the project incorporated upscale decorative tile as a focal point. This design strategy creates visual interest by drawing the eye and creating a designed, intentional appearance rather than monotonous uniformity. The stove area faces the most intense splatter and heat, so premium tile provides maximum protection in this high-demand zone.
Feature tile selections—whether mosaic patterns, natural stone, metallic finishes, or artistic designs—allow homeowners to inject personality into their kitchen. Thoughtful tile design details signal quality and care in the renovation, elevating the entire project’s perceived value.
Tile Installation Considerations
Professional tile installation requires clean, dry, level, and appropriately primed surfaces. In this project, the fresh drywall provided an ideal substrate. Experienced installers plan layouts to minimize awkward cuts and ensure symmetry, particularly important with feature tile designs.
Kitchen backsplashes require moisture-resistant thinset mortar appropriate for the specific tile type. Quality tile spacers ensure consistent grout lines. Grout color affects appearance dramatically. This project likely used grout matching the homeowners’ aesthetic preference—either contrasting to emphasize tile pattern or complementary for subtle integration.
Grout requires sealing to prevent staining and moisture absorption. Quality grout sealer protects your investment. Regular resealing (typically annually) maintains protection and appearance.
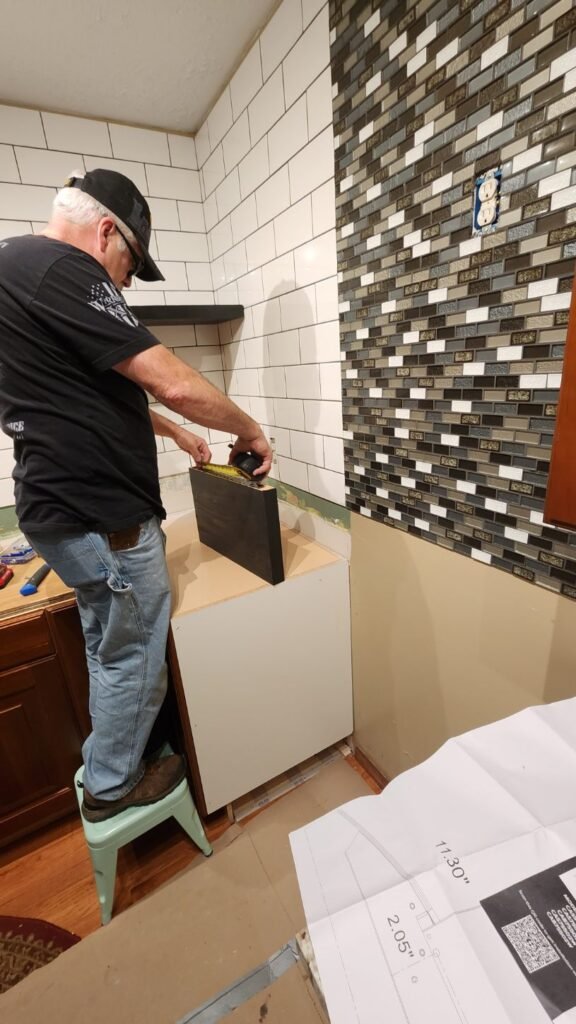
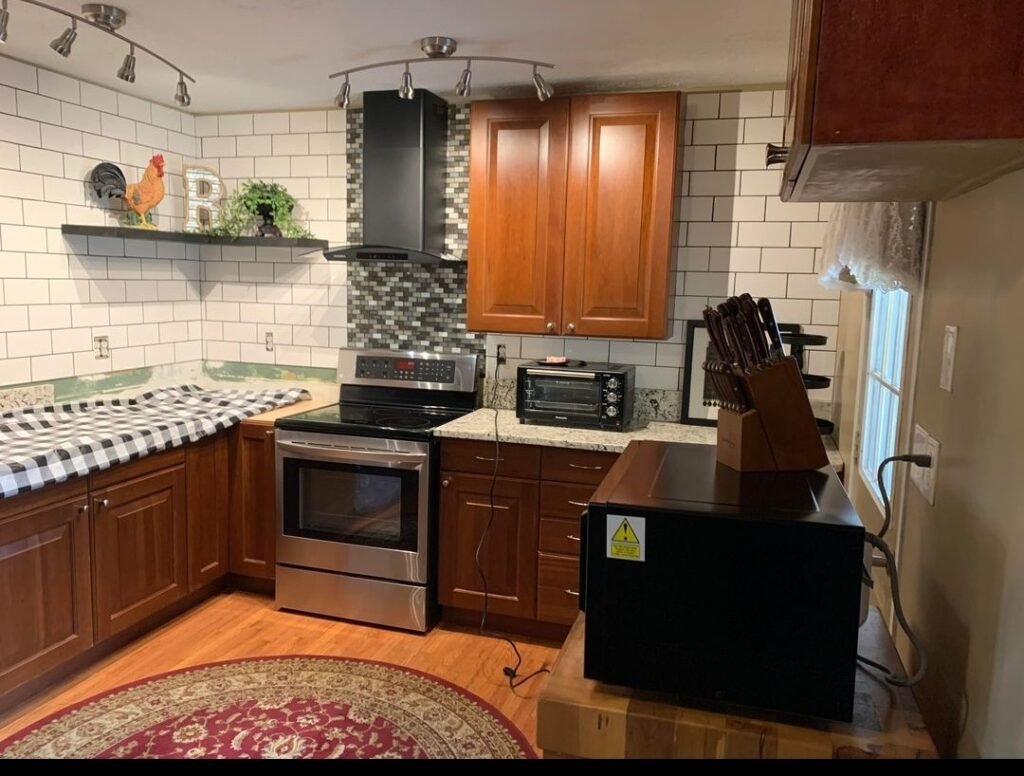
Ventilation and Appliance Installation
The final construction phases involved installing modern ventilation and positioning appliances—the elements that transform the space from beautiful construction into a functional kitchen.
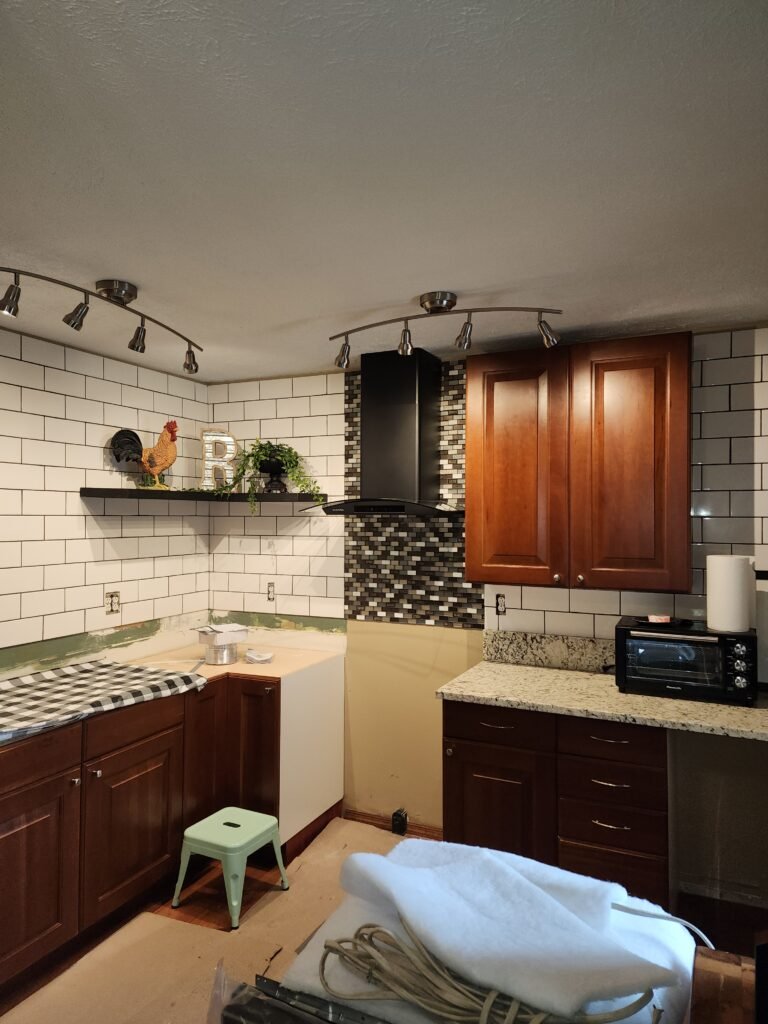
Range Hood and Ventilation
A new vent for the stove gave the kitchen a modern look while addressing both function and aesthetics. Modern range hoods remove cooking odors, smoke, grease, and moisture from the kitchen. In Southern Ohio’s humid climate, effective ventilation helps prevent moisture accumulation that can lead to mold growth and cabinet damage. Quality range hoods move 300-600 CFM (cubic feet per minute) of air, adequate for most residential cooking.
The best performance comes from externally vented hoods that exhaust air outside. This requires ductwork through the roof or an exterior wall. Recirculating hoods filter and return air to the kitchen—less effective but sometimes necessary when external venting isn’t feasible.
Modern range hoods range from sleek under-cabinet models to dramatic statement pieces. In this Wheelersburg kitchen, the new ventilation system contributed significantly to the updated, contemporary appearance. Most range hoods include integrated task lighting, illuminating the cooktop for safer and more pleasant cooking.
Appliance Installation
With cabinetry, countertops, flooring, and backsplash complete, appliances return to create the final, functional kitchen. Positioning and leveling ensures doors close properly and appliances operate efficiently. If using a built-in or counter-depth model, precise measurement is critical for proper fit.
Gas appliances require certified connection to gas lines with appropriate shut-off valves. Electric models need properly rated circuits and outlets. Appliances must be level for proper operation and appearance. Dishwasher installation involves connecting to hot water supply, drain line, and electrical circuit, then securing the unit to adjacent cabinetry and ensuring it’s level for proper door operation and drainage.
If using an over-the-range microwave instead of or in addition to a separate range hood, these combination units require mounting to wall studs and upper cabinets, with electrical connection and often ducting for external venting. The disposal connects to electrical and drain systems, and the sink is sealed to the countertop with plumber’s putty or silicone.
In this Wheelersburg project, seeing appliances in position marked the transition from construction site to completed kitchen—the moment when the family could begin using their beautiful new space.
Budget and Timeline Insights for Scioto County Kitchen Remodels
While specific financial details of this project aren’t publicly disclosed, the approach offers valuable lessons for Southern Ohio homeowners planning kitchen renovations.
Cost Factors in This Renovation
Kitchen remodeling costs vary dramatically based on materials, scope, and labor. This project’s smart material sourcing significantly impacted overall investment. By purchasing quality cabinets and granite secondhand, the homeowners potentially saved $10,000-$15,000 compared to new equivalents. High-quality cabinets that might retail for $15,000-$20,000 new, plus granite countertops at $4,000-$6,000 installed, were secured for a fraction of retail cost.
While materials were discounted, professional services still carried standard rates. Countertop re-fabrication and installation, cabinet installation, tile work, and flooring installation all required skilled labor at market rates typical for the Portsmouth and Scioto County area.
The homeowner’s ability to handle electrical and plumbing updates personally represented significant additional savings. Professional electrical and plumbing work for a complete kitchen gut and rebuild typically runs $3,000-$5,000 in the Southern Ohio region. The unexpected archway reinforcement added costs, illustrating why contingency budgets are essential. Structural repairs can range from a few hundred to several thousand dollars depending on complexity.
For detailed cost breakdowns specific to Southern Ohio markets, see our Kitchen Remodeling Costs Southern Ohio: Complete 2026 Budget Guide.
Timeline Considerations
Full kitchen renovations of this scope typically require 4-8 weeks in the Scioto County area, depending on complexity of structural or mechanical work, availability of contractors and materials, weather impacts on external venting installation, countertop fabrication schedules, and unforeseen issues discovered during demolition.
This project’s timeline likely extended toward the longer end of that range given the structural repairs and comprehensive scope of work.
Lessons for Your Kitchen Remodeling Project
This Wheelersburg kitchen transformation offers several takeaways for homeowners considering their own renovations.
Strategic Material Sourcing Pays Dividends
The Facebook Marketplace cabinet and countertop purchase demonstrates the value of patient, opportunistic shopping. Quality secondhand materials can deliver tremendous value, but success requires understanding what constitutes quality in cabinetry and countertops, realistic expectations about adaptation requirements, budget allocation for professional modification and installation, and willingness to be flexible in design to accommodate available materials.
Expect the Unexpected
The structural issues discovered during demolition weren’t visible before the project began. In any renovation of a home over 20-30 years old, plan for discoveries. Maintain a 10-15% contingency budget specifically for addressing unforeseen issues. This prevents mid-project funding crises and allows proper correction of problems rather than compromise solutions.
Comprehensive Updates Deliver Best Results
This project went beyond just replacing cabinets—it addressed structural concerns, updated mechanical systems, installed new surfaces throughout, and created a cohesively designed space. Comprehensive renovations, while more expensive initially, provide longer intervals before next renovation becomes necessary, better return on investment with all systems updated simultaneously, cohesive design without piecemeal appearance, and addressing of hidden issues before they become major problems.
Professional Installation Maximizes Material Value
Even exceptional materials look mediocre with poor installation. The quality cabinets and granite in this project needed professional installation to achieve their potential. Skilled craftsmanship ensures properly leveled and aligned cabinets, precise countertop fabrication and fitting, quality tile work with proper layout and grouting, and flooring installation that will perform well for decades.
Our network includes qualified contractors throughout the Portsmouth and Scioto County region who bring the expertise necessary for professional results. When evaluating contractors, look for proper licensing, insurance, references, and portfolios demonstrating quality work.
Patience and Planning Prevent Problems
Successful kitchen renovations require extensive planning before demolition begins. This project’s success stemmed partly from thorough preparation including complete measurements and layout planning, material sourcing before construction start, coordination of multiple trades and tasks, realistic timeline expectations, and contingency planning for living through the renovation.
Frequently Asked Questions About Kitchen Remodeling in Southern Ohio
Is buying secondhand cabinets and countertops a good way to save money on a kitchen remodel?
Purchasing quality secondhand materials can deliver significant savings—often 40-60% compared to new equivalents—but success requires careful evaluation. Inspect cabinet construction quality, including joinery, drawer slides, and hardware. For countertops, check for chips, cracks, or damage that might make them unsuitable. Understand that you’ll need professional fabrication and installation to adapt materials to your space, and be flexible in your design to accommodate what’s available.
The Wheelersburg project demonstrates this approach’s potential when executed thoughtfully. Budget for transportation, possible storage, and professional modification costs. When you find exceptional materials like the homeowners in this project did, the savings can be substantial while still achieving a high-quality result.
How long does a complete kitchen gut and remodel typically take in the Portsmouth area?
Full kitchen renovations involving gutting to studs and complete rebuilds typically require 4-8 weeks in Scioto County, though timelines vary based on project complexity, contractor availability, and unforeseen issues. Structural repairs, custom countertop fabrication, and mechanical system updates can extend timelines. Weather can also impact schedules, particularly if external venting installation is required.
The most realistic approach is working with your contractor to establish a detailed timeline with milestones, but maintaining flexibility for reasonable delays. During this period, you’ll be without a functional kitchen, so planning temporary cooking arrangements is essential. Projects involving major structural work or highly custom elements may extend beyond 8 weeks, while simpler remodels with fewer unknowns may complete more quickly.
What unexpected issues commonly appear during kitchen demolition in older Ohio Valley homes?
Homes built during the 1960s-1980s boom frequently reveal hidden issues during kitchen demolition. Structural concerns like undersized headers in archways or load-bearing wall modifications rank among the most common and critical discoveries. Electrical systems often show outdated wiring, insufficient circuits for modern appliances, and outlets not meeting current code.
Plumbing may have aged connections ready for failure, galvanized pipes showing corrosion, or configurations that complicate new layouts. Subfloor damage from old leaks, particularly near dishwashers and sinks, appears regularly. Some homes contain asbestos in old flooring or insulation, requiring professional abatement. Moisture damage in exterior walls near windows or areas with poor historical ventilation can necessitate repairs.
This is why maintaining a 10-15% contingency budget is crucial—not as pessimism but as practical planning for discoveries that commonly occur in renovation projects.
Should I handle any parts of my kitchen remodel myself to save money?
The answer depends heavily on your skills, available time, and local code requirements. In this Wheelersburg project, the homeowner’s professional trades background allowed him to safely and legally handle electrical and plumbing updates, saving thousands in labor costs. However, most homeowners should approach this cautiously.
Certain tasks—demolition, painting, some tile work—can reasonably be DIY projects for capable individuals. Others—electrical work, gas line installation, structural modifications, countertop fabrication—require professional expertise for both quality results and safety. Additionally, Ohio building codes require permits and inspections for major electrical, plumbing, and structural work, with some work requiring licensed tradespeople.
Poor DIY work can create safety hazards, code violations that complicate future home sales, and often costs more to repair than professional work would have cost initially. Be honest about your capabilities, understand code requirements, and recognize that professional installation often provides warranties and guarantees that protect your investment.
How much should I budget for a complete kitchen remodel in Scioto County?
Kitchen remodeling costs vary enormously based on size, material quality, and scope of work, but for a complete gut and rebuild in the Portsmouth and Scioto County area, budget ranges typically fall between $25,000 and $75,000 for most projects.
A basic remodel with stock cabinets, laminate countertops, vinyl flooring, and standard appliances might come in at $25,000-$35,000. Mid-range projects with semi-custom cabinets, granite or quartz countertops, quality flooring, and good appliances typically run $40,000-$60,000. High-end renovations with custom cabinetry, premium stone countertops, luxury appliances, and architectural details can exceed $75,000.
This Wheelersburg project likely fell in the mid-range category due to the quality materials, though the secondhand cabinet and countertop purchase reduced costs significantly. Always maintain a 10-15% contingency budget for unexpected discoveries. Projects requiring significant structural work, moving plumbing or gas lines, or addressing foundational issues will trend toward higher ends of these ranges.
Ready to Start Your Kitchen Transformation?
This Wheelersburg kitchen renovation demonstrates how strategic planning, quality materials, and skilled craftsmanship combine to create exceptional results. Whether you’re considering a complete gut and rebuild or a more focused update, understanding the process helps you make informed decisions that maximize your investment.
For more guidance on planning your Southern Ohio kitchen remodeling project, explore our comprehensive resources including detailed cost guides, material comparisons, and design inspiration from completed projects throughout the region.
Our network includes qualified contractors throughout the Portsmouth, Wheelersburg, and Scioto County region who can help transform your kitchen vision into reality. We partner with professionals who understand both the technical requirements and the unique considerations of Southern Ohio home improvement projects.
FTC Disclosure: This article contains affiliate links to products on Amazon. As an Amazon Associate, Kore Komfort Solutions earns from qualifying purchases at no additional cost to you. We only recommend products we believe will be helpful for your home improvement projects.

Author: Mike Warner
Mike Warner — Founder, Kore Komfort Solutions LLC U.S. Army veteran. 30 years in the trades — HVAC installation, kitchen and bathroom remodeling, and residential construction across Alaska, Washington, Colorado, Ohio, Kentucky, and Tennessee. I've pulled permits, managed crews, run service calls at midnight, and built a business from a single truck. Now I build the digital infrastructure that helps contractors compete and win. Kore Komfort Solutions exists for one reason: to give small and mid-size contractors ($2M–$10M) the same AI-powered tools, websites, and business systems that the big operations use — without the enterprise price tag or the learning curve. Through Kore Komfort Digital, we design and manage high-performance WordPress websites engineered to rank on Google and convert local searches into booked jobs. Through Rose — our AI-powered business management system currently in development — we're building the future of how contractors handle leads, scheduling, estimates, and customer communication. I write about what I know: the trades, the technology reshaping them, and how to build a contracting business that runs on systems instead of chaos. Every recommendation on this site comes from someone who's actually done the work — not a marketer who Googled it.
1 thought on “Wheelersburg Kitchen Remodel”