Article Navigation
- Key Takeaways
- Kitchen Remodeling Costs
- Planning Your Timeline
- Layout and Design Considerations
- Cabinet Selection and Installation
- Countertop Materials Compared
- Appliance Recommendations
- Flooring Options
- Lighting Design
- Plumbing Fixtures and Sinks
- Backsplash Materials
- DIY vs Professional Installation
- Return on Investment
- Common Mistakes to Avoid
- Frequently Asked Questions
FTC Disclosure: This article contains affiliate links. When you purchase products through our links, we may earn a commission at no additional cost to you. We only recommend products we genuinely believe will benefit your kitchen remodeling project. All opinions and recommendations are our own based on research and industry expertise.
Key Takeaways
- Budget Planning: Minor kitchen remodels average $15,000-$30,000, mid-range remodels $30,000-$75,000, and upscale remodels $75,000-$150,000+, with cabinets and labor typically consuming 50-60% of total costs
- Timeline Expectations: Most kitchen remodels take 6-12 weeks from demolition to completion, with 4-8 weeks of pre-construction planning essential for success
- Cabinet Investment: Cabinets represent 30-40% of your budget; we recommend semi-custom options for optimal quality-to-value ratio versus stock or fully custom alternatives
- Countertop Selection: Quartz offers the best combination of durability, maintenance, and aesthetics for most homeowners, though granite, quartzite, and butcher block each serve specific design goals
- ROI Considerations: Minor kitchen remodels recoup 72-83% of costs at resale, while major upscale remodels recoup 54-67%, making strategic mid-range investments most financially prudent
Kitchen remodeling represents one of the most impactful home improvement investments you can make, both for daily quality of life and property value. Whether you’re addressing functional deficiencies in an outdated kitchen or creating your dream culinary workspace, understanding the costs, design principles, material options, and process timeline is essential for successful project execution.
This comprehensive guide examines every aspect of kitchen remodeling, from initial budget planning through final fixture installation. We’ll analyze material comparisons with specific product recommendations, evaluate design trends with longevity, and provide realistic cost expectations based on current market data. Our goal is to equip you with the knowledge needed to make informed decisions that align with your functional needs, aesthetic preferences, and financial parameters.
Kitchen Remodeling Costs: Complete Budget Breakdown
Understanding kitchen remodeling costs requires examining both the aggregate project investment and the individual component expenses that comprise your total budget. Cost variations depend on kitchen size, material selections, labor market conditions, and scope of structural modifications.
National Average Cost Ranges
Minor Kitchen Remodel ($15,000-$30,000): This tier typically includes cosmetic updates without layout changes—cabinet refacing or painting, new countertops, updated hardware, fresh backsplash, new sink and faucet, and updated lighting fixtures. Existing appliances remain in place, and no structural modifications occur. This approach suits homeowners seeking refreshed aesthetics on limited budgets or those preparing homes for sale.
Mid-Range Kitchen Remodel ($30,000-$75,000): This represents the most common remodeling scope, including new semi-custom cabinets, quartz or granite countertops, mid-range appliance replacements, new flooring throughout, updated lighting with recessed fixtures, new backsplash installation, and potentially minor layout modifications like removing a short wall section. Plumbing and electrical systems receive updates as needed, though major relocations remain minimal.
Upscale Kitchen Remodel ($75,000-$150,000+): High-end remodels feature custom cabinetry, premium countertop materials like quartzite or marble, professional-grade appliances, significant layout modifications potentially including structural changes, custom lighting design, high-end flooring materials, and extensive finish work. These projects often involve relocating plumbing and electrical systems, adding square footage through additions or reconfiguring adjacent spaces.
Cost Breakdown by Component
Cabinets (30-40% of budget): Cabinet costs vary dramatically by construction quality, material, and customization level. Stock cabinets from home improvement stores range $75-$200 per linear foot, semi-custom cabinets $150-$650 per linear foot, and fully custom cabinets $500-$1,500+ per linear foot. For a typical 10×12-foot kitchen requiring approximately 20 linear feet of cabinetry, expect total cabinet costs between $3,000-$30,000 depending on selection tier.
Countertops (10-15% of budget): Material selection dramatically affects countertop investment. Laminate costs $20-$50 per square foot installed, butcher block $40-$100 per square foot, quartz $60-$150 per square foot, granite $60-$120 per square foot, quartzite $70-$200 per square foot, and marble $75-$250 per square foot. Edge profiles, cutouts for sinks and cooktops, and backsplash height impact final pricing.
Appliances (10-20% of budget): Appliance packages range from budget-friendly options around $2,500 total (basic refrigerator, range, dishwasher, and microwave) to professional-grade packages exceeding $20,000. Mid-range appliance packages from reputable manufacturers typically cost $5,000-$10,000 and offer excellent reliability and features for most homeowners.
Labor (20-35% of budget): Professional installation labor represents the second-largest expense category after cabinets. General contractor services, specialized trades (plumbing, electrical, HVAC), cabinet installation, countertop fabrication and installation, tile work, and finish carpentry combine to consume roughly one-quarter to one-third of total project costs. Labor rates vary significantly by geographic market, with urban areas commanding premium pricing.
Flooring (5-10% of budget): Kitchen flooring costs depend on material selection and subfloor condition. Luxury vinyl plank costs $3-$10 per square foot installed, ceramic or porcelain tile $5-$15 per square foot, engineered hardwood $8-$16 per square foot, and natural stone $10-$30 per square foot. A 120-square-foot kitchen floor typically requires $600-$3,600 in flooring materials and installation.
Lighting, Plumbing, Hardware (10-15% of budget): These finishing elements include recessed lighting ($150-$300 per fixture installed), pendant lighting ($200-$1,000+ per fixture), under-cabinet lighting systems ($300-$1,500), faucets ($150-$1,500), sinks ($200-$2,000), cabinet hardware ($3-$30 per pull), and various switches, outlets, and trim details.
Planning Your Kitchen Remodeling Timeline
Successful kitchen remodeling requires realistic timeline expectations and thorough pre-construction planning. Rushed projects frequently encounter budget overruns, material delays, and compromised quality, while properly planned renovations proceed smoothly despite inevitable challenges.
Pre-Construction Phase (4-8 Weeks)
Design Development (2-4 weeks): This initial phase involves measuring your existing kitchen, identifying functional deficiencies, researching design ideas, creating preliminary layout concepts, and establishing budget parameters. We recommend using digital design tools or working with kitchen designers to visualize proposed layouts before committing to specific plans. Consider how you actually use your kitchen—cooking frequency, entertaining patterns, storage needs, and workflow preferences—to inform design decisions.
Material Selection (2-3 weeks): Cabinet, countertop, flooring, appliance, and fixture selections require careful research and comparison shopping. Visit showrooms to see materials in person, request samples to evaluate in your home’s lighting, and compare warranties and maintenance requirements. Many homeowners underestimate material selection time and rush decisions they later regret; allocate sufficient time for thoughtful evaluation.
Contractor Selection and Permitting (1-2 weeks): If hiring professionals, obtain multiple detailed quotes, verify licenses and insurance, check references, and review previous project photos. Secure necessary building permits before construction begins; permit applications typically require 1-2 weeks for approval depending on local building department workload and project complexity. For those in the Ohio Valley region seeking qualified contractors, explore our Ohio Valley contractor directory for vetted professionals.
Construction Phase (6-12 Weeks)
Demolition (3-5 days): Removing existing cabinets, countertops, appliances, flooring, and potentially walls creates significant disruption and generates substantial debris. Professional demolition services cost $1,000-$3,000 for typical kitchens but accelerate this process considerably compared to DIY demolition. Proper demolition includes disconnecting all utilities, protecting adjacent spaces from dust and damage, and disposing of materials responsibly.
Rough-In Work (1-2 weeks): Plumbing, electrical, and HVAC modifications occur after demolition before new finishes are installed. This phase includes relocating or adding plumbing lines, upgrading electrical service if needed, installing new circuits for appliances and lighting, running new HVAC ducts or registers, and addressing any structural modifications like removing walls or adding support beams. Building inspections typically occur after rough-in work completion.
Cabinet Installation (3-5 days): Professional cabinet installers hang wall cabinets first, then base cabinets, ensuring level installation and proper spacing for appliances. Cabinet installation timing assumes cabinets arrive as ordered; custom cabinets may require 8-12 weeks lead time from order to delivery, representing the longest lead time in most kitchen remodels. Order cabinets early in your planning process to avoid project delays.
Countertop Templating and Installation (1-2 weeks): After cabinet installation, fabricators create templates for precise countertop cutting. Template creation takes 1-2 hours, fabrication requires 7-10 days, and installation takes 4-8 hours depending on kitchen size and complexity. Countertops cannot be templated until cabinets are installed, creating sequential dependency in project scheduling.
Flooring Installation (2-5 days): Flooring installation occurs after cabinets and before appliances in most projects, though some contractors prefer installing flooring first. Tile installations require additional time for mortar and grout curing before heavy traffic or appliance placement. Ensure adequate drying time before proceeding to subsequent phases.
Backsplash Installation (1-3 days): Tile backsplashes require surface preparation, thin-set application, tile setting, and grouting. Complex patterns or small tile sizes extend installation time. Grout requires 24-72 hours to cure fully before exposure to moisture.
Finish Work and Punch List (3-7 days): Final trim installation, hardware mounting, light fixture installation, plumbing fixture connection, appliance delivery and installation, touch-up painting, and final cleaning complete your project. Create a detailed punch list of remaining items and deficiencies requiring correction before making final payment to contractors.
Layout and Design Considerations
Kitchen layout fundamentally determines functionality and workflow efficiency. While aesthetic choices are highly personal, certain design principles create more functional kitchens regardless of style preferences.
The Work Triangle Principle
Traditional kitchen design organizes layouts around the work triangle—the path between your refrigerator, sink, and cooktop. Optimal work triangles measure 12-26 feet in total perimeter, with each leg measuring 4-9 feet. Triangles smaller than 12 feet create cramped work areas, while triangles exceeding 26 feet require excessive movement during meal preparation. Modern open-concept kitchens often employ work zones rather than strict triangles, but the underlying principle of efficient movement between primary work areas remains valid.
Common Kitchen Layouts
Galley Kitchen: Two parallel counters create efficient workflows in narrow spaces, making galley kitchens ideal for small homes or secondary kitchens. The compact design minimizes steps between work zones but limits multiple cooks working simultaneously. Galley kitchens function best when one end remains open rather than closed off, preventing bottlenecks.
L-Shaped Kitchen: This popular layout positions cabinets and appliances along two perpendicular walls, leaving remaining walls open for dining areas or traffic flow. L-shaped designs accommodate work triangles naturally and work well in open-concept floor plans. The corner typically requires specialized cabinet solutions like lazy susans or pull-out corner organizers to maximize storage accessibility.
U-Shaped Kitchen: Surrounding the cook on three sides, U-shaped kitchens provide maximum counter space and storage in compact footprints. This layout creates highly efficient work triangles but can feel enclosed in small spaces. Ensure adequate clearance between opposing cabinets—minimum 42 inches, preferably 48 inches—for comfortable movement.
Island Kitchen: Adding an island to L-shaped or U-shaped layouts creates additional counter space, storage, and often seating areas. Islands function best in kitchens measuring at least 12×14 feet; smaller spaces become cramped with island additions. Maintain 42-48 inches of clearance around all island sides for comfortable traffic flow and cabinet access. Islands exceeding 4 feet in length should include dedicated electrical outlets for small appliances.
Peninsula Kitchen: Similar to island layouts but with one side attached to walls or cabinets, peninsulas provide island benefits in spaces too small for freestanding islands. Peninsulas naturally define kitchen boundaries in open-concept homes while maintaining visual connection to adjacent living spaces.
Design Trends with Longevity
Two-Tone Cabinets: Contrasting upper and lower cabinet colors or featuring distinctive island colors adds visual interest without overwhelming spaces. We recommend pairing neutral base cabinets with lighter upper cabinets to maintain timeless appeal, such as gray lowers with white uppers. Avoid trendy colors that may feel dated quickly; stick with classic color palettes.
Open Shelving: Removing some upper cabinets in favor of open shelving creates airy, accessible storage for frequently used items and decorative pieces. Implement open shelving thoughtfully—limit to one wall section rather than entire kitchen perimeters, and ensure you’re comfortable with the visual discipline required to keep open shelves organized and attractive.
Large-Format Tile: Floor and backsplash tiles measuring 12×24 inches or larger create clean, contemporary aesthetics with minimal grout lines. Larger tiles also reduce installation time and grout maintenance compared to small-format alternatives. Rectified edges allow tighter grout lines for even cleaner appearances.
Matte Finishes: Matte cabinet finishes, faucets, and hardware reduce fingerprint visibility and create sophisticated, contemporary aesthetics. While polished finishes dominated kitchens for decades, matte options increasingly represent mainstream choices rather than trendy alternatives, suggesting lasting appeal.
Smart Storage Solutions: Pull-out pantries, drawer dividers, vertical tray storage, appliance garages, and corner solutions like magic corners maximize storage functionality. Invest in quality storage accessories during initial construction rather than attempting retrofits later; proper planning creates dramatically more functional kitchens.
Cabinet Selection and Installation
Cabinets represent your largest single material investment and most visible design element. Understanding construction quality, material options, and customization levels helps you select cabinets that balance aesthetic goals with budget realities.
Cabinet Construction Quality Levels
Stock Cabinets: Pre-manufactured in standard sizes and limited finish options, stock cabinets offer the most budget-friendly option with immediate availability. Quality varies significantly by manufacturer; better stock cabinets feature plywood box construction and soft-close hinges, while economy options use particleboard construction with basic hardware. Stock cabinets limit design flexibility since available sizes may not perfectly fit your space, requiring filler strips and compromises.
Semi-Custom Cabinets: We recommend semi-custom cabinets for most homeowners seeking optimal quality-to-value ratios. These cabinets offer extensive finish options, multiple door styles, various storage accessories, and some dimensional customization (typically 3-inch increments) while maintaining reasonable pricing through standardized construction processes. Quality semi-custom brands include KraftMaid, Aristokraft, and Diamond Cabinets. Expect 6-8 week lead times from order to delivery.
Custom Cabinets: Built to exact specifications by local cabinet shops, fully custom cabinets accommodate unusual dimensions, unique design requirements, and premium material preferences. Custom cabinets make sense when space constraints prevent standard sizing, when you desire unusual configurations, or when budget permits premium investment. Lead times typically extend 10-14 weeks, with pricing reflecting individual craftsmanship and material quality.
Cabinet Material Options
Plywood Box Construction: Cabinets with 3/4-inch plywood sides, backs, and bottoms provide superior structural integrity, better screw-holding capacity, and improved moisture resistance compared to particleboard alternatives. Quality manufacturers use furniture-grade plywood with consistent thickness and smooth surfaces. Expect to pay 15-30% premiums for plywood construction versus particleboard, representing worthwhile investment for long-term durability.
Door and Drawer Front Materials: Solid wood doors offer traditional beauty with natural grain patterns but require periodic maintenance and may expand or contract with humidity changes. Medium-density fiberboard (MDF) with painted finishes provides stable, consistent surfaces resistant to expansion, making MDF ideal for painted cabinets. Thermofoil-wrapped MDF offers durable, moisture-resistant surfaces at moderate cost but limits refinishing options if you later desire color changes.
Door Styles and Finish Trends
Shaker Style: This timeless design features flat center panels surrounded by square frame edges, creating clean lines compatible with both traditional and contemporary aesthetics. Shaker cabinets represent safe, enduring choices that won’t feel dated as design trends evolve. Available in any finish from natural wood tones to painted colors, shaker-style cabinets suit virtually any kitchen aesthetic.
Flat-Panel (Slab) Doors: Completely flat doors without any frame detail create modern, minimalist aesthetics. These work especially well in contemporary kitchens with horizontal grain patterns or high-gloss finishes. Fingerprints show more readily on flat doors than on detailed alternatives, particularly with dark colors or glossy finishes.
Raised Panel Doors: Traditional cabinets often feature raised center panels creating dimension and visual interest. These suit formal, traditional kitchen designs but may feel dated in contemporary spaces. If selecting raised panel cabinets, choose subtle profile details rather than heavily ornate options for better longevity.
Essential Cabinet Features
Soft-Close Hinges and Drawer Glides: These mechanisms prevent slamming, reduce wear, and create quiet, refined cabinet operation. Soft-close features add approximately $200-$400 to average kitchen cabinet costs but represent worthwhile investment for daily convenience and long-term durability. Blum and Grass manufacture industry-leading soft-close hardware.
Drawer Boxes: Quality drawer construction features dovetail or dado joints, 5/8-inch solid wood or plywood sides, and full-extension ball-bearing glides rated for 75-100 pounds. Avoid stapled drawer construction and thin drawer sides that fail under regular use. Test drawer operation in showrooms; quality drawers operate smoothly and feel substantial.
Interior Cabinet Finish: Better cabinets feature matching interior finishes, though this increases costs. Minimum acceptable standards include sealed white melamine interiors for easy cleaning and stain resistance. Natural wood or matching paint interiors represent premium features that enhance perceived quality when opening cabinets.
Cabinet Installation Recommendations
Professional cabinet installation typically costs $50-$100 per linear foot, representing worthwhile investment for proper level installation, secure wall attachment, and careful handling of expensive materials. Poor installation creates visible gaps, operating issues, and potential safety hazards if wall cabinets lack proper support. For DIY installations, invest in quality levels (4-foot and 6-foot laser levels), proper shimming materials, and adequate temporary support systems for hanging upper cabinets safely.
The Bosch GLL 100 G Green Beam Self-Leveling Cross-Line Laser Level provides essential accuracy for cabinet installation, projecting perfectly level and plumb reference lines for precise cabinet positioning. Green beam lasers offer superior visibility in bright conditions compared to red beam alternatives, and self-leveling functionality eliminates manual calibration time.
Countertop Materials Compared
Countertop selection affects kitchen aesthetics, functionality, durability, and maintenance requirements. Each material category offers distinct advantages and limitations; understanding these tradeoffs helps you select surfaces aligned with your priorities.
Quartz (Engineered Stone)
Composition and Performance: Quartz countertops combine 90-94% ground natural quartz with polymer resins and pigments, creating non-porous, uniform surfaces more consistent than natural stone. We recommend quartz for most homeowners seeking optimal performance balance—these surfaces resist staining, never require sealing, withstand heat up to 350°F, and offer extensive color and pattern options including marble-look designs without marble’s maintenance requirements.
Advantages: Non-porous surface prevents bacteria growth and staining, no sealing required ever, consistent color and pattern, extensive design options from solid colors to realistic stone patterns, good scratch resistance, and relatively easy repairs for minor damage.
Limitations: Visible seams in larger kitchens, potential discoloration from prolonged direct sunlight exposure, not heat-proof (hot pans can damage resin binders), typically costs more than basic granite options, and cannot be refinished if damaged—damaged sections require replacement.
Cost Expectations: Quartz countertops range $60-$150 per square foot installed depending on brand, color complexity, edge profiles, and fabrication difficulty. Mid-range quartz from reputable manufacturers (Cambria, Caesarstone, Silestone) typically costs $80-$110 per square foot installed. A typical 50-square-foot kitchen with standard edges requires $4,000-$5,500 for quality quartz countertops.
Granite (Natural Stone)
Composition and Performance: Natural granite forms from cooled magma deep underground, creating durable igneous rock with unique patterns unreplicable in any other material. Each granite slab displays distinctive color variations, mineral patterns, and character that many homeowners value for individual expression. Modern sealers have largely addressed granite’s primary historical weakness—porosity requiring periodic sealing—though maintenance requirements persist.
Advantages: Heat resistant (hot pans cause no damage), extremely hard and scratch-resistant, unique natural patterns ensure no two installations look identical, generally lower cost than quartz for basic colors, adds resale value perception, and ages gracefully developing subtle patina over time.
Limitations: Requires periodic sealing (annually or biannually depending on granite density and sealer quality), can stain if spills aren’t cleaned promptly, certain exotic colors show visible seams more prominently, natural fissures and color variations may not appeal to those preferring uniform appearance, and radon emission concerns though typically negligible.
Cost Expectations: Granite pricing varies dramatically by color rarity and origin. Common domestic colors cost $60-$80 per square foot installed, popular imported colors $80-$120 per square foot, and exotic colors $150+ per square foot. A typical kitchen requires $3,500-$6,000 for granite countertops including fabrication and installation.
Quartzite (Natural Stone)
Composition and Performance: Often confused with quartz due to similar names, quartzite is natural stone formed from sandstone subjected to extreme heat and pressure. Harder than granite, quartzite offers remarkable durability with marble-like aesthetics, appealing to homeowners seeking natural stone beauty with superior performance. Quartzite represents premium natural stone investment with corresponding pricing.
Advantages: Extremely hard—resists scratching better than granite or marble, heat resistant, many quartzites resemble marble with white and gray veining but with superior durability, UV-stable (won’t fade or discolor in sunlight), and develops character over time while maintaining structural integrity.
Limitations: Requires periodic sealing like granite, premium pricing, limited color options compared to quartz, seams can be visible particularly in white and light-colored quartzites, and harder material can chip more readily at edges compared to slightly softer stones.
Cost Expectations: Quartzite countertops range $70-$200 per square foot installed depending on color rarity and origin. Popular white quartzites like Sea Pearl or Taj Mahal typically cost $100-$150 per square foot. Expect $5,000-$10,000 for typical kitchen installations.
Butcher Block (Wood)
Composition and Performance: Wood countertops created from laminated hardwood strips offer warm, natural aesthetics particularly popular in farmhouse, cottage, and Scandinavian-inspired kitchens. Butcher block requires more maintenance than stone alternatives but provides unique character, natural antibacterial properties when properly maintained, and actual functionality as cutting surface in food preparation areas.
Advantages: Warm, natural appearance, relatively affordable, can be sanded and refinished to remove scratches and stains, gentle on dishes and glasses, naturally antibacterial when properly oiled, and DIY-friendly installation for those with woodworking skills.
Limitations: Requires regular oiling (monthly initially, quarterly once seasoned), susceptible to water damage if not properly sealed and maintained, can warp or crack if exposed to significant moisture, shows wear and knife marks (character to some, damage to others), and requires immediate cleanup of spills particularly acidic substances.
Cost Expectations: Butcher block countertops cost $40-$100 per square foot installed depending on wood species and thickness. Common species like maple or oak cost $45-$65 per square foot, while premium hardwoods like walnut cost $80-$100 per square foot. DIY installations significantly reduce costs; pre-finished butcher block sections cost $30-$60 per square foot for materials only.
For DIY butcher block installation and maintenance, we recommend Walrus Oil Cutting Board Oil, a food-safe mineral oil and beeswax combination that penetrates wood surfaces deeply, protects against moisture damage, and maintains the natural beauty of wood countertops. Apply every 2-3 weeks initially, then monthly once wood is properly seasoned.
Laminate
Composition and Performance: Laminate countertops consist of particleboard or MDF cores covered with printed plastic laminate surfaces. Modern laminates have advanced considerably beyond older generations, offering improved durability, broader design options including convincing stone patterns, and integrated backsplash options. While not matching stone performance, quality laminates serve budget-conscious homeowners well.
Advantages: Most affordable countertop option, easy DIY installation for those comfortable with basic tools, extensive color and pattern options, low maintenance requirements, non-porous surfaces resist staining, and modern laminates with matte finishes look significantly better than glossy alternatives.
Limitations: Visible seams especially with patterned laminates, cannot be refinished if damaged, vulnerable to scratches and chips, heat damage from hot pans, and lower resale value perception compared to stone alternatives. Once damaged, entire sections require replacement rather than spot repairs.
Cost Expectations: Laminate countertops cost $20-$50 per square foot installed, making them the most budget-friendly option. Pre-formed sections with integrated backsplashes cost even less—typically $10-$20 per linear foot—but limit design flexibility. A typical kitchen requires $1,000-$2,500 for laminate countertops including installation.
Solid Surface (Corian and Similar)
Composition and Performance: Acrylic or polyester-based solid surface materials offer seamless installations, integrated sinks, and repairable surfaces that can be sanded to remove minor damage. Corian pioneered this category in the 1970s; multiple manufacturers now offer similar products. Solid surface represents middle-ground option between laminate and stone in both performance and pricing.
Advantages: Seamless appearance even in large kitchens, integrated sinks eliminate seams and associated cleaning challenges, repairable through sanding for minor damage, non-porous surfaces resist staining, thermoformable allowing curved edges and backsplashes, and consistent color throughout material thickness.
Limitations: Not heat-resistant—hot pans cause burn marks, scratches more easily than stone though minor scratches can be sanded out, limited pattern realism compared to natural stone or quality quartz, can show wear more readily than stone alternatives, and declining popularity as quartz has become competitively priced.
Cost Expectations: Solid surface countertops cost $50-$100 per square foot installed, overlapping quartz pricing in many markets. Given similar costs, most homeowners now choose quartz for superior performance, making solid surface less common in new installations than previous decades.
Appliance Recommendations
Appliance selection balances budget, features, energy efficiency, reliability, and aesthetic integration. We recommend focusing on proven reliability and essential features rather than excessive technology that may fail or become obsolete.
Refrigerators
Configuration Selection: French door refrigerators with bottom freezers dominate current market share, offering convenient refrigerator access at eye level with wide shelves for large items. These configurations typically cost $1,800-$4,000 for quality models. Side-by-side refrigerators provide narrow door swings beneficial in galley kitchens but offer less usable shelf width. Top-freezer models remain most affordable ($800-$1,500) and energy-efficient but feel dated aesthetically.
Counter-Depth vs. Standard Depth: Counter-depth refrigerators align with surrounding cabinetry, creating integrated appearances particularly valued in contemporary kitchens. However, counter-depth models sacrifice 20-25% interior capacity compared to standard depth alternatives while typically costing $500-$1,000 more. Unless visual integration is priority, standard depth models offer better value and capacity.
Essential Features: Focus on adjustable shelving with spill-proof glass surfaces, humidity-controlled crisper drawers, adequate door storage, and interior LED lighting. Ice makers add convenience but represent common failure points; external ice and water dispensers increase failure risk further while consuming door space. Energy Star certification ensures efficient operation, typically adding $30-$60 annually to operating costs compared to minimum efficiency models.
We recommend the LG French Door Refrigerators for their consistent reliability ratings, excellent temperature management, spacious interiors, and reasonable pricing. LG’s linear compressors with 10-year warranties provide confidence in long-term durability, while intuitive controls and quality construction justify mid-range pricing.
Ranges and Cooktops
Gas vs. Electric vs. Induction: Gas ranges offer responsive heat control and instant visual feedback, appealing to serious cooks who prefer flame cooking. However, gas ranges produce combustion byproducts requiring ventilation, complicate kitchen air quality management, and typically cost more initially due to gas line requirements if not existing.
Standard electric smooth-top ranges represent most affordable options ($600-$1,500) with reliable performance but slower heat response than gas. Electric ovens often outperform gas ovens for baking due to more even heat distribution and better moisture management.
Induction cooktops offer fastest heating, precise temperature control, energy efficiency, and cooler cooking environments but require magnetic-compatible cookware and command premium pricing ($1,500-$4,000). Induction technology has matured; early reliability concerns have largely resolved. We recommend induction for homeowners willing to invest in optimal cooking performance and replacing cookware if needed.
Range Configuration: Freestanding ranges remain most affordable and easiest to install, fitting between cabinets with finished sides. Slide-in ranges eliminate gaps between range and counters, creating integrated appearances but typically cost $200-$500 more. Professional-style ranges with high-BTU burners appeal to serious cooks but require professional-grade ventilation systems (600+ CFM) adding significant cost.
The GE Profile Induction Ranges deliver excellent cooking performance with proven reliability at accessible pricing. These models include air fry convection ovens, Wi-Fi connectivity for remote monitoring, and no-preheat air fry settings that genuinely work well, making them versatile options for modern cooking needs.
Dishwashers
Performance Priorities: Cleaning performance, noise level, and reliability matter most in dishwasher selection. Quality dishwashers thoroughly clean dishes on normal cycles without pre-rinsing, operate at 45 decibels or quieter (conversation-level noise), and provide 5-7 years of reliable service with minimal repairs.
Key Features: Third racks for flatware and small items maximize loading flexibility, adjustable tines accommodate various dish sizes, soil sensors optimize water and energy usage, and sanitize cycles achieve 155°F+ water temperatures for baby bottles and cutting boards. Stainless steel tubs outlast plastic tubs and improve drying performance through better heat retention.
Drying Systems: Heated dry uses electric elements drying dishes but increases energy consumption and can warp plastic items. Condensation drying relies on residual heat from final rinse, using less energy but requiring longer drying times. Fan-assisted drying accelerates condensation drying without heating elements, offering good balance of energy efficiency and performance.
Bosch dishwashers consistently rank among the quietest and most reliable options available. The Bosch 500 Series operates at 44 decibels, includes third rack and adjustable tines, uses condensation drying for energy efficiency, and provides excellent cleaning performance. These models typically cost $900-$1,100, representing optimal value in the mid-range dishwasher category.
Microwaves
Configuration Options: Over-range microwaves combine microwave and range hood functions, saving counter space in smaller kitchens. However, these units typically provide only 300-400 CFM ventilation—adequate for light cooking but insufficient for serious cooking or gas ranges which require 600+ CFM. Over-range microwaves cost $200-$600 for quality models.
Countertop microwaves remain most affordable ($100-$300) and easiest to install but consume valuable counter space. Built-in microwaves integrate with cabinetry for clean aesthetics but cost significantly more ($800-$1,500) and require professional installation with dedicated electrical circuits.
Drawer microwaves install below countertops, offering accessible placement and integrated appearance but commanding premium pricing ($1,200-$2,000) and requiring significant cabinet space.
Power and Size Considerations: Most kitchens benefit from 1,000-1,200 watt microwaves with 1.5-2.0 cubic foot capacity. Lower wattage units heat food slowly and unevenly, while excessive capacity wastes space. Sensor cooking features that adjust cooking time based on steam detection work well in quality models, providing more consistent results than time-based cooking alone.
Ventilation Systems
Hood Types and Requirements: Under-cabinet range hoods mount beneath cabinets above ranges, representing most common and affordable option ($150-$600). Wall-mounted hoods extend from walls without cabinets above, creating statement pieces but requiring structural wall support ($300-$2,000). Island hoods mount to ceilings above island ranges, requiring ductwork through ceilings and commanding premium prices ($600-$3,000+).
CFM Requirements: Calculate required CFM (cubic feet per minute) by multiplying range BTU output by 0.1 for typical cooking, 0.15 for frequent cooking, or 0.2 for professional ranges. A standard 40,000 BTU gas range requires 400-600 CFM ventilation for adequate smoke and odor removal. Induction and electric ranges generate less heat, allowing lower CFM ratings (300-400 CFM typically sufficient).
Ducted vs. Ductless: Ducted hoods exhaust air outside, providing genuine ventilation and removing cooking byproducts from homes. Always choose ducted configurations when possible. Ductless (recirculating) hoods filter air through charcoal filters then return it to kitchens, providing minimal benefit—these remove grease but not heat, moisture, or combustion byproducts. Use ductless hoods only when ducting exterior is impossible.
The Broan Range Hood Collection offers reliable ventilation at accessible pricing. Broan’s under-cabinet models provide 300-600 CFM capacity with multi-speed controls, dishwasher-safe filters, and integrated lighting, making them practical choices for most residential cooking needs.
2026 Remodeling Cost Guide
Don’t get ripped off. See real pricing for bathrooms, kitchens, and HVAC.
Updated for 2026 Market Rates
Flooring Options
Kitchen flooring must withstand moisture, foot traffic, dropped items, and frequent cleaning while complementing your overall design aesthetic. Material selection affects comfort, maintenance, and long-term durability.
Luxury Vinyl Plank (LVP)
Performance Characteristics: Luxury vinyl plank represents the most practical kitchen flooring option for most homeowners, combining water resistance, durability, comfort underfoot, realistic wood or stone appearances, and DIY-friendly installation. Modern LVP has evolved considerably from older vinyl sheet goods, offering impressive performance and aesthetics at moderate cost.
Advantages: 100% waterproof (true waterproof, not water-resistant), soft and warm underfoot compared to tile or stone, realistic wood grain patterns or stone textures, scratch and dent resistant, easy maintenance requiring only regular sweeping and occasional damp mopping, and floating installation suitable for DIY projects. Quality LVP with proper installation lasts 15-25 years.
Selection Criteria: Choose LVP at least 5mm thick (6-8mm preferred) with wear layers of 12-20 mil for residential use. Thicker products feel more substantial, resist indentation better, and install more easily. Rigid core LVP (also called WPC or SPC) offers superior stability and dent resistance compared to flexible vinyl. Look for products with attached underlayment for easier installation and improved comfort.
Cost Expectations: Quality LVP costs $3-$8 per square foot for materials, plus $2-$4 per square foot for professional installation. A 120-square-foot kitchen typically requires $600-$1,440 for materials and labor. DIY installation reduces costs to materials only, with straightforward click-lock systems manageable for homeowners with basic tool skills.
We recommend Luxury Vinyl Plank for its rigid core construction, realistic wood patterns, scratch resistance, and genuine waterproof performance.
Ceramic and Porcelain Tile
Performance Characteristics: Tile flooring offers exceptional durability, water resistance, and design flexibility through countless sizes, colors, and patterns. Porcelain tile is denser and more water-resistant than ceramic tile, making it preferred choice for kitchens. Both materials last indefinitely with proper installation and maintenance, justifying moderate-to-high initial investment.
Advantages: Extremely durable—resists scratching, staining, and moisture damage, easy to clean, infinite design options, adds resale value, works with radiant floor heating systems, and typically outlasts other flooring materials. Larger format tiles (12×24 inches or larger) reduce grout lines creating cleaner appearances and easier maintenance.
Limitations: Cold and hard underfoot, uncomfortable for extended standing during meal preparation, dropped dishes and glasses break more readily than on resilient flooring, professional installation recommended for quality results, and grout lines require periodic cleaning and eventual resealing. Consider anti-fatigue mats in primary work areas for improved comfort.
Cost Expectations: Ceramic tile costs $5-$10 per square foot installed, while porcelain tile costs $8-$15 per square foot installed. Larger format tiles reduce installation labor slightly. A typical 120-square-foot kitchen requires $960-$1,800 for porcelain tile flooring including materials and labor. High-end artisan tiles or complex patterns increase costs substantially.
Engineered Hardwood
Performance Characteristics: Engineered hardwood combines thin hardwood wear layers with plywood or HDF core materials, creating stable flooring suitable for kitchens with proper selection and maintenance. Unlike solid hardwood which should not be installed in kitchens due to moisture sensitivity, quality engineered hardwood with adequate wear layers can serve kitchens well.
Kitchen-Appropriate Selection: Choose engineered hardwood with minimum 3mm wear layers (4-6mm preferred), allowing future refinishing if needed. Thinner wear layers (1-2mm) common in lower-cost products cannot be refinished and should be avoided. Factory-finished products with aluminum oxide or similar durable finishes resist scratches and moisture better than site-finished alternatives. Ensure warranties specifically cover kitchen installations; many manufacturers exclude kitchens from coverage.
Advantages: Natural wood beauty and warmth, more stable than solid hardwood in humidity fluctuations, can be refinished if adequate wear layer thickness, warmer and more comfortable underfoot than tile, and adds perceived value to homes. Floating installation systems allow DIY projects for capable homeowners.
Limitations: Water damage remains concern—standing water must be cleaned immediately, more expensive than LVP with less water resistance, refinishing costs money when wear layer eventually shows damage, and susceptible to scratches from pet nails and dragged furniture. Use protective pads under all furniture legs and area rugs in high-traffic zones.
Cost Expectations: Quality engineered hardwood suitable for kitchens costs $6-$12 per square foot for materials, plus $3-$5 per square foot for professional installation. A 120-square-foot kitchen requires $1,080-$2,040 for materials and labor. DIY floating installations reduce costs to materials only.
Natural Stone
Performance Characteristics: Slate, travertine, and limestone create distinctive, high-end aesthetics with natural variation that appeals to homeowners seeking unique character. These materials offer exceptional durability when properly installed and sealed, though maintenance requirements exceed other kitchen flooring options.
Advantages: Unique natural beauty with no two tiles identical, extremely durable with proper care, works well with radiant floor heating, cool surfaces beneficial in warm climates, and timeless appeal that doesn’t follow trends.
Limitations: Requires professional installation, needs periodic sealing (frequency depends on stone type and sealer quality), cold and hard underfoot, shows wear patterns in high-traffic areas developing patina some appreciate and others dislike, grout maintenance requirements similar to ceramic tile, and premium pricing.
Cost Expectations: Natural stone flooring costs $10-$30 per square foot installed depending on stone type, tile size, and pattern complexity. Slate typically costs $10-$18 per square foot installed, travertine $12-$25 per square foot, and limestone $15-$30 per square foot. A 120-square-foot kitchen requires $1,200-$3,600 minimum for natural stone flooring.
Lighting Design
Effective kitchen lighting combines ambient, task, and accent lighting layers, creating functional workspaces while enhancing aesthetic appeal. Poor lighting creates shadows in work areas, diminishes food preparation safety, and makes kitchens feel uninviting.
Ambient (General) Lighting
Recessed Lighting: Also called can lights or downlights, recessed fixtures installed in ceiling cavities provide clean, unobtrusive general illumination. Plan recessed lighting on 4-foot centers for even distribution, with fixtures 18-24 inches from walls to minimize shadows. Choose 4-inch or 6-inch housings based on ceiling height—4-inch works well for standard 8-foot ceilings, while 6-inch suits higher ceilings.
Modern LED retrofit kits transform existing recessed housings into efficient, long-lasting fixtures with adjustable color temperatures. The Sunco Lighting LED Recessed Kits offer excellent value with 13-watt output equivalent to 75-watt incandescent bulbs, dimmable performance, and 3000K or 4000K color temperature options. These install in minutes without electrical expertise, making them ideal for updating existing kitchens.
Pendant Lighting: Suspended fixtures over islands or peninsulas provide focused general lighting while creating visual interest and defining spaces. Hang pendants 30-36 inches above countertops for optimal illumination without obstructing sightlines. For islands, space multiple pendants evenly—typically 24-30 inches apart for medium-sized fixtures.
Consider fixture scale carefully; oversized pendants suit large kitchens with high ceilings, while smaller fixtures work better in standard kitchens. Match pendant finish to other hardware (faucets, cabinet pulls) for cohesive design integration.
Task Lighting
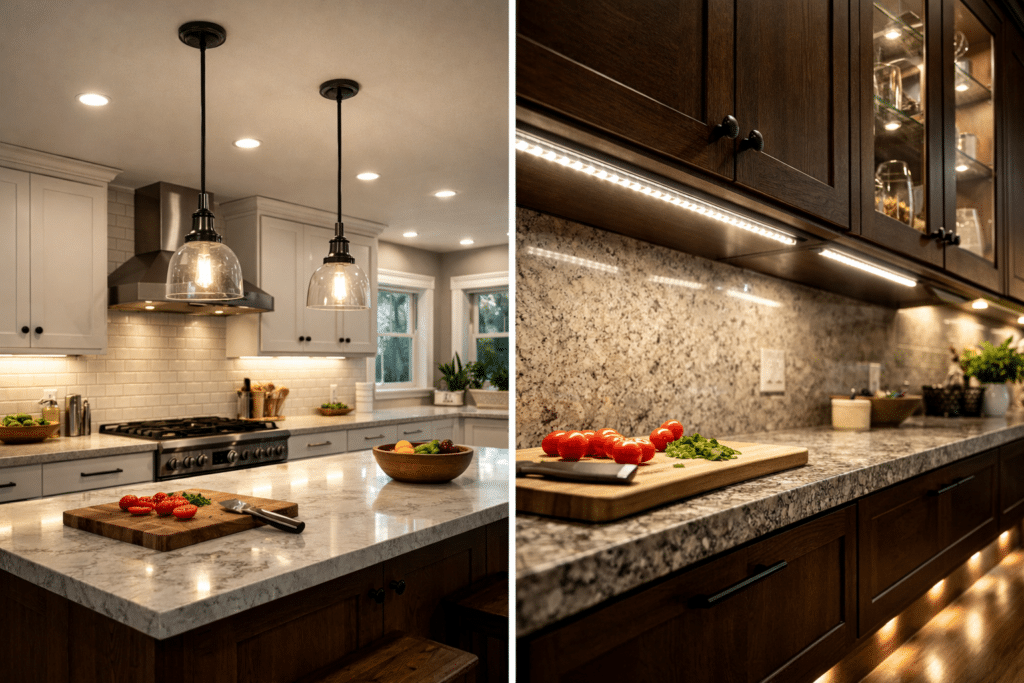
Under-Cabinet Lighting: Illumination mounted beneath upper cabinets eliminates shadows on countertops, dramatically improving food preparation safety and ease. Under-cabinet lighting represents the most impactful single lighting upgrade in most kitchens, yet many homeowners omit this critical layer.
LED tape lights or puck lights mount easily, consume minimal electricity, and provide decades of maintenance-free operation. Position lights toward front edges of cabinets rather than backs to minimize shadows. Dimmer controls allow adjusting brightness for different activities and times of day.
The LE LED Under Cabinet Lighting Kits provide plug-in installation requiring no electrical work, making them accessible for any homeowner. These include adhesive backing for secure mounting, linkable design connecting multiple light bars to single plugs, and dimmable operation. Choose 3000K warm white for inviting ambiance or 4000K neutral white for optimal task visibility.
Task Lighting Over Sinks: Ceiling-mounted fixtures directly above sinks ensure adequate illumination for dish washing and food preparation. If existing general lighting doesn’t adequately illuminate sink areas, consider adding dedicated fixtures—recessed lights, small pendants, or semi-flush ceiling fixtures depending on kitchen style and ceiling height.
Accent Lighting
Cabinet Interior Lighting: LED strips or puck lights installed inside glass-front cabinets highlight display pieces while adding subtle ambient glow. These require switching separated from general lighting, allowing independent control for creating ambiance during entertaining or evening hours.
Toe-Kick Lighting: LED strips mounted in toe-kick areas beneath base cabinets create gentle night lighting and add contemporary flair. While primarily decorative, toe-kick lighting provides enough illumination for safe nighttime kitchen access without overhead lighting. Motion sensors allow automatic activation when approaching kitchen areas.
Above-Cabinet Lighting: If space exists between cabinet tops and ceilings, LED strips placed atop cabinets create soft indirect lighting washing across ceilings. This technique works particularly well in kitchens with traditional crown molding, where uplighting accentuates architectural details.
Color Temperature and Dimming
Color Temperature Selection: Measured in Kelvin (K), color temperature affects kitchen ambiance dramatically. Warm white (2700-3000K) creates cozy, inviting atmospheres similar to incandescent bulbs, working well for ambient and accent lighting. Neutral white (3500-4000K) provides crisper, more focused illumination optimal for task lighting. Cool white (5000K+) creates clinical appearance better suited to commercial kitchens than residential spaces.
Most kitchens benefit from consistent color temperature across all fixtures, typically 3000K, balancing warmth with adequate task visibility. Mixing color temperatures creates disjointed appearances unless intentionally used to differentiate task from ambient lighting.
Dimmer Integration: Install dimmer switches on all lighting circuits, allowing adjustment for different activities and times of day. LED-specific dimmers prevent flickering and buzzing common when using standard dimmers with LED fixtures. Lutron Skylark and Leviton Decora offer reliable LED-compatible dimmers at reasonable prices.
Plumbing Fixtures and Sinks
Sink and faucet selection affects daily kitchen functionality significantly, yet these components often receive insufficient consideration during planning. Quality fixtures operate reliably for decades with minimal maintenance, justifying careful selection and professional installation.
Kitchen Sink Configuration Options
Single Bowl vs. Double Bowl: Single bowl sinks maximize usable space, easily accommodate large pots and baking sheets, and simplify cleanup of oversized items. Double bowl sinks allow simultaneous tasks like washing vegetables while soaking dishes, though individual bowls are necessarily smaller. Most contemporary kitchens favor single bowl configurations for increased flexibility, particularly when paired with pulldown faucets featuring spray functions.
Undermount vs. Drop-In Installation: Undermount sinks mount beneath countertops with exposed countertop edges, creating seamless appearances and allowing wiping debris directly into sinks. These require professional installation and work only with solid countertop materials (granite, quartz, solid surface). Drop-in sinks rest on top of countertops with visible rim edges, offering easier DIY installation and compatibility with laminate countertops but collecting debris around rim edges.
Apron-Front (Farmhouse) Sinks: These statement sinks extend forward from cabinets with exposed front panels, creating distinctive traditional or country aesthetics. Apron-front sinks typically feature large single bowls beneficial for washing oversized items but require specialized cabinet bases. Prices range $400-$2,000 depending on material and quality.
Sink Material Comparison
Stainless Steel: We recommend stainless steel for most homeowners seeking optimal durability, functionality, and value. Quality stainless sinks use 16 or 18-gauge steel (lower numbers indicate thicker, more durable material), resist staining and corrosion, suit any kitchen style, and typically cost $200-$800 for quality models. Soundproofing undercoatings reduce noise from running water and dish impacts. Brushed finishes hide water spots better than polished alternatives.
The Kraus Standart PRO Kitchen Sinks feature premium 16-gauge stainless steel, commercial-grade soundproofing, and deep bowl designs that prevent splashing while accommodating large cookware. These include basket strainers, bottom grids protecting sink surfaces, and limited lifetime warranties reflecting build quality confidence.
Composite Granite: Combining crushed granite with acrylic resins, composite sinks offer stone-like durability and appearance in various colors including black, white, and earth tones. These resist scratching, heat damage, and staining better than stainless steel, require minimal maintenance, and hide water spots effectively. However, composite sinks cost $300-$1,000 for quality models and may chip if heavy items are dropped, with chips being difficult to repair invisibly.
Cast Iron with Enamel Coating: Traditional cast iron sinks with porcelain enamel coatings provide classic aesthetics, excellent durability, and diverse color options. The heavy material dampens sound naturally, and enamel surfaces clean easily. However, these sinks are extremely heavy requiring reinforced cabinet support, enamel can chip exposing bare iron to rust, and prices range $400-$1,500 for quality models from manufacturers like Kohler.
Fireclay: Created by molding clay then firing at extreme temperatures, fireclay sinks offer superior durability in pristine white finishes favored for farmhouse and traditional kitchens. These resist scratching, staining, and chipping better than cast iron, maintain color permanently, and provide authentic character. Fireclay sinks typically cost $600-$2,000 and require professional installation due to substantial weight.
Kitchen Faucet Selection
Faucet Styles: Pulldown faucets with integrated spray heads represent most popular contemporary options, offering convenience and functionality in single units. High-arc spouts provide clearance for filling large pots, while pulldown sprayers simplify rinsing sinks and washing produce. Bridge faucets with exposed pipes create traditional aesthetics but cost more. Wall-mounted faucets free up counter space but require professional installation accessing wall plumbing.
Finish Durability: Chrome remains most durable and affordable finish, resisting corrosion and scratches while requiring simple cleaning. Stainless steel suits stainless appliances and sinks, offering similar durability with brushed appearance hiding water spots. Oil-rubbed bronze and matte black finishes create distinctive looks but show water spots readily and may wear unevenly over time. Ensure finishes match or intentionally contrast with cabinet hardware for cohesive design.
Quality Features: Ceramic disk valves provide drip-free operation and 500,000-cycle ratings (approximately 10-15 years of typical use). Solid brass bodies resist corrosion better than zinc alternatives. Pull-down spray heads should lock securely in place without drooping. Magnetic docking systems keep spray heads aligned better than friction alone. Single-handle faucets offer easier one-handed operation than two-handle alternatives, though some prefer two-handle aesthetics.
The Moen Arbor Collection delivers excellent value with Reflex technology providing smooth spray head operation, Duralast cartridges ensuring drip-free performance, and Power Clean spray technology offering 50% more spray power than standard pulldowns. These faucets include limited lifetime warranties and are available in multiple finishes matching most kitchen aesthetics.
Backsplash Materials and Design
Backsplashes protect walls from moisture and staining while providing opportunities for decorative expression in kitchens. Material selection affects maintenance requirements, durability, and visual impact.
Ceramic and Porcelain Tile
Versatility and Options: Ceramic and porcelain tiles represent most common backsplash materials, offering endless size, shape, color, and pattern options at reasonable costs. Subway tile (3×6 inches) remains timelessly popular, working equally well in traditional and contemporary kitchens. Larger format tiles (4×12 or 4×16 inches) reduce grout lines creating cleaner appearances. Mosaic tiles in various patterns add visual interest and texture.
Installation Considerations: Tile backsplashes require proper surface preparation, thin-set adhesive application, spacer use for consistent grout lines, and careful grouting. DIY installation is achievable for homeowners comfortable with tile work, though professional installation ensures quality results particularly around outlets, windows, and corners. Ceramic tile costs $5-$20 per square foot installed, while porcelain costs $8-$30 per square foot depending on size, style, and installation complexity.
Grout Selection: Unsanded grout works best for grout lines 1/8 inch or narrower (typical for most backsplashes), while sanded grout suits wider joints. Light-colored grouts require more maintenance showing stains more readily, while medium and darker grouts hide staining better. Epoxy grouts resist staining superior to cement-based alternatives and never require sealing, though they cost more and require different installation techniques.
Natural Stone Tile
Materials and Aesthetics: Marble, travertine, and slate tiles create sophisticated, high-end aesthetics with natural variation. These materials pair particularly well with similar countertop materials or create intentional contrast when paired with different surfaces. Stone backsplashes require more maintenance than ceramic or porcelain alternatives, needing periodic sealing to prevent staining.
Practical Considerations: Marble shows etching from acidic substances like tomato sauce, lemon juice, or vinegar, potentially marring backsplash appearance in areas around cooktops and sinks. Honed finishes hide etching better than polished alternatives while providing more slip resistance. Stone tile costs $15-$40 per square foot installed, representing premium investment suited to high-end kitchen projects.
Glass Tile
Contemporary Appeal: Glass tiles reflect light creating luminous, contemporary aesthetics particularly popular in modern kitchens. Available in countless colors from subtle neutrals to vibrant jewel tones, glass tiles offer design flexibility. These materials resist staining completely, never require sealing, and clean easily, though they show water spots and fingerprints readily.
Installation Requirements: Glass tiles require white thin-set to prevent color distortion, as standard gray thin-set shows through transparent or translucent tiles. Professional installation is recommended; glass tiles reveal installation imperfections more readily than opaque alternatives. Glass tile costs $25-$75 per square foot installed, representing premium pricing typically reserved for accent areas rather than full backsplashes.
Slab Backsplashes
Seamless Appearance: Using the same material as countertops for backsplashes creates seamless transitions and dramatically simplified maintenance with no grout lines. Quartz, granite, or quartzite slabs extended up walls cost more than tile alternatives but provide distinctive, upscale appearances while simplifying cleaning.
Practical Implementation: Full-height slab backsplashes (18-20 inches) provide maximum protection and visual impact but increase material costs substantially. Four-inch backsplashes offer minimal protection and dated appearances; six-inch heights represent practical minimums. Discuss backsplash height preferences with countertop fabricators during template appointments; many fabricators include standard four-inch backsplashes in quoted prices.
Metal Tiles and Panels
Industrial and Contemporary Options: Stainless steel, copper, and aluminum tiles or panels create distinctive industrial or contemporary aesthetics. These materials are heat-resistant making them particularly suitable behind cooktops, though they show fingerprints and water spots readily. Brushed or patterned finishes hide imperfections better than polished alternatives.
Cost and Installation: Metal backsplashes range from affordable stainless steel tiles ($15-$30 per square foot) to expensive copper panels ($50-$100 per square foot). Some metal tiles install with adhesive backing for DIY-friendly applications, while others require professional installation. Consider metal backsplashes for accent areas behind cooktops rather than entire kitchen perimeters to control costs.
Beadboard and Wood Panels
Traditional Charm: Painted beadboard or shiplap creates cottage or farmhouse aesthetics particularly popular in traditional kitchen designs. These materials install relatively easily, cost less than tile alternatives ($8-$15 per square foot installed), and add texture and warmth. However, wood backsplashes require proper sealing to resist moisture damage and clean less easily than tile or stone alternatives. Limit wood backsplashes to areas away from sinks and cooktops to minimize moisture exposure.
DIY vs Professional Installation
Determining which kitchen remodeling tasks to DIY and which to hire professionals for affects project costs, quality, timeline, and stress levels. Honest assessment of your skills, available time, and tool access informs wise decisions.
Suitable DIY Tasks
Demolition: Removing existing cabinets, countertops, and appliances requires minimal skill beyond careful work and proper disposal planning. Homeowners with basic tools save $1,000-$3,000 by handling demolition personally. Exercise caution around plumbing and electrical connections; shut off water and power before disconnecting fixtures. Protect floors, adjacent rooms, and airways from dust and debris.
Cabinet Installation: Installing cabinets requires precision but remains achievable for detail-oriented homeowners with adequate time and proper tools. Critical success factors include accurate measurements, level reference lines, proper wall anchoring into studs, careful shimming, and methodical approach working from corners outward. Budget 2-4 days for typical kitchen cabinet installation. Poor installation creates operational issues and safety hazards; if uncertain, hire professionals.
Painting: Cabinet painting saves substantial money versus replacement while dramatically refreshing kitchen aesthetics. Proper surface preparation—cleaning, sanding, priming—matters more than application technique. Use quality cabinet paint formulated for durability and smooth finishes. Remove doors and hardware, paint in well-ventilated areas, and allow adequate drying time between coats. Budget 3-5 days including drying time.
Hardware Installation: Cabinet hardware upgrades provide high impact for minimal cost and effort. Use templates ensuring consistent placement across all cabinets. Drill carefully to avoid tear-out on cabinet faces; drill from front through backs for clean holes. This task requires only drill, driver, and template.
Backsplash Installation: Tile backsplashes represent achievable DIY projects for homeowners with patience and attention to detail. Success requires proper surface preparation, consistent spacer use, adequate thin-set working time, and careful grouting. Begin with simple tile patterns in straight runs before attempting complex layouts. Budget 2-3 days including grouting and cleaning.
LVP Flooring Installation: Floating luxury vinyl plank installs more easily than most flooring types, requiring only basic tools and careful measuring. Proper subfloor preparation—clean, flat, and dry—ensures good results. Stagger seams between rows, maintain 1/4-inch expansion gaps at walls, and undercut door casings for professional appearance. Most homeowners complete 120-square-foot kitchens in one weekend.
Tasks Requiring Professional Expertise
Electrical Work: Adding circuits, relocating outlets, installing dedicated appliance circuits, and lighting modifications require licensed electricians in most jurisdictions. Improper electrical work creates fire and electrocution hazards. Additionally, permit requirements and inspection processes benefit from professional knowledge. Electrical work typically costs $75-$150 per hour plus materials.
Plumbing Modifications: Moving sinks, adding appliance connections, installing gas lines, or modifying drain systems requires professional plumbers. While simple fixture replacements might be DIY-friendly, structural plumbing changes demand expertise preventing leaks, ensuring proper venting, and meeting code requirements. Plumbing services cost $90-$180 per hour plus materials.
Countertop Fabrication and Installation: Cutting, polishing, and installing stone countertops requires specialized tools and expertise beyond typical DIY capabilities. Stone slabs are heavy, fragile, and expensive; mistakes cost thousands in replacement materials. Professional fabricators ensure proper template accuracy, precise cutting, polished edges, secure installation, and appropriate seam placement. Leave countertop installation to professionals.
Structural Modifications: Removing walls, installing support beams, or adding square footage requires engineering expertise ensuring structural integrity and code compliance. Structural work demands permits and inspections. Never remove walls without professional assessment determining whether walls are load-bearing and what support systems are needed.
Complex Tile Work: While simple backsplashes suit DIY approaches, floor tiling requires proper subfloor preparation, slope management around drains, and precision cutting. Large format tiles are particularly unforgiving of imperfect substrates. Professional tile installers create level, properly sloped installations that prevent lippage and ensure long-term performance.
Cabinet Refinishing: Achieving factory-quality paint finishes on cabinets requires spray equipment, climate-controlled environments, and finishing expertise. Professional cabinet painters remove, spray, and reinstall doors ensuring durable, smooth finishes difficult to achieve with brushes or rollers. While significantly cheaper than replacement, professional painting still costs $3,000-$8,000 for typical kitchens.
Hybrid Approaches
Many successful kitchen remodels employ hybrid approaches, handling appropriate tasks personally while hiring professionals for specialized work. This strategy controls costs while ensuring quality outcomes in areas requiring expertise. Consider handling demolition, painting, hardware installation, and simple backsplash work yourself while hiring professionals for plumbing, electrical, countertops, and complex installations. This balanced approach typically saves 30-40% versus fully contracted projects while maintaining quality and safety.
Return on Investment Analysis
Kitchen remodeling affects home value differently depending on project scope, quality level, local market conditions, and how long you retain ownership before selling. Understanding ROI helps frame remodeling as either personal enjoyment investment or strategic home value enhancement.
National ROI Averages
According to Remodeling Magazine’s Cost vs. Value Report, minor kitchen remodels recoup approximately 72-83% of costs at immediate resale, while major upscale remodels recoup only 54-67%. This counterintuitive data reflects several factors: upscale remodels often exceed local market expectations creating overimprovements, buyers discount remodeling costs knowing materials cost less than contractors charge, and personal preferences vary widely making one person’s dream kitchen another’s aesthetic nightmare.
Minor Kitchen Remodel ($15,000-$30,000): These projects typically recoup 75-85% of investment in first year and often pay for themselves fully through increased buyer appeal if you remain in home 2-3 years before selling. Minor remodels address functional deficiencies and outdated aesthetics without overspending relative to home value, making them financially prudent for near-term sellers.
Mid-Range Major Remodel ($30,000-$75,000): Comprehensive remodels with quality materials recoup approximately 60-70% at immediate resale, improving to 80-90% if you live in remodeled space 5-7 years. These projects create significant lifestyle improvements justifying investment even without full cost recovery, particularly when addressing serious functional deficiencies or preparing homes for long-term ownership.
Upscale Major Remodel ($75,000-$150,000+): High-end remodels rarely return full investment at resale, typically recovering 50-65% of costs. These projects should be undertaken primarily for personal enjoyment rather than investment returns. If planning to sell within five years, luxury remodels represent poor financial decisions; focus instead on mid-range improvements meeting buyer expectations without exceeding market norms.
Geographic Variations
ROI varies significantly by region and local market conditions. Markets with high home appreciation rates like West Coast metropolitan areas tend to recoup higher percentages than slow-appreciation markets. Neighborhoods with higher average home values support more expensive kitchen investments than working-class neighborhoods where $100,000 kitchens exceed buyer expectations.
Research comparable home sales in your neighborhood, noting kitchen quality levels in recently sold properties. Align your remodeling investment with neighborhood norms; dramatically exceeding local standards creates overimprovements unlikely to return investment. For Ohio Valley homeowners evaluating local market standards, understanding regional expectations helps right-size remodeling investments.
Maximizing Remodeling Value
Focus on Function First: Projects addressing functional deficiencies return investment better than purely aesthetic updates. Inadequate storage, poor workflow, insufficient lighting, and outdated appliances represent legitimate problems buyers recognize and value resolving. In contrast, replacing perfectly functional cabinets because you prefer different styles provides personal enjoyment but limited financial return.
Choose Timeless Over Trendy: Classic design choices maintain appeal across buyer demographics and taste preferences, while trendy selections risk feeling dated quickly. Neutral cabinet colors, traditional layouts, quality materials in standard configurations, and understated finishes appeal broadly. Save bold design statements for easily changed elements like paint colors or accessories rather than cabinets and countertops.
Maintain Quality Consistency: Match kitchen quality to whole-house quality levels. Installing luxury kitchens in modest homes creates incongruous mismatches buyers question, while budget kitchens in upscale homes disappoint buyer expectations. Ensure finished quality aligns with home’s overall character and neighborhood standards.
Avoid Overimprovement: Kitchen investments should represent 10-15% of home value maximum. A $50,000 kitchen makes sense in $400,000 homes but overimproves $200,000 properties. Conservative remodeling investments aligned with property value produce better returns than expensive projects exceeding market support.
Consider Phased Approaches: If budgets are limited, phase remodeling across multiple years. Begin with highest-impact improvements (cabinets and countertops), adding appliances, flooring, and lighting in subsequent phases. Phased approaches prevent taking on excessive debt while allowing you to enjoy improvements during ownership.
Common Kitchen Remodeling Mistakes to Avoid
Learning from others’ errors prevents costly mistakes and disappointing outcomes. These common pitfalls affect homeowners across experience and budget levels.
Planning and Design Mistakes
Insufficient Planning Time: Rushing from concept to construction without adequate planning creates problems throughout projects. Spend 4-8 weeks minimum researching options, creating detailed plans, selecting materials, and obtaining quotes before demolition begins. Patient planning prevents expensive change orders, material delays, and design regrets.
Ignoring Workflow and Ergonomics: Kitchens must function efficiently for meal preparation, cleaning, and storage. Neglecting work triangle principles, inadequate counter space near appliances, insufficient landing zones beside refrigerators, and poor storage accessibility create frustrating daily experiences despite attractive aesthetics. Prioritize function over appearance when conflicts arise.
Inadequate Storage Planning: Most kitchens suffer from insufficient storage rather than excess capacity. Plan for 20% more storage than you currently use, anticipating future needs. Incorporate specialized storage solutions—drawer dividers, pull-out pantries, vertical tray storage, and corner solutions—during initial construction rather than attempting retrofits later.
Poor Lighting Design: Single ceiling fixtures provide inadequate kitchen lighting. Plan layered lighting including ambient, task, and accent layers. Ensure task lighting eliminates shadows in work areas, particularly under cabinets illuminating countertops. Don’t forget dimmer switches allowing lighting adjustment for different activities and times.
Budget and Financial Mistakes
Unrealistic Budget Expectations: Underestimating costs leads to compromised quality, incomplete projects, or financial stress. Research material and labor costs thoroughly, obtain detailed quotes from multiple contractors, and add 15-20% contingency for unexpected issues discovered during demolition or code compliance requirements. Kitchen remodeling always costs more than initial estimates suggest.
Allocating Budget Poorly: Spending excessive percentages on one element forces compromises elsewhere. Balanced budget allocation—approximately 30-40% cabinets, 10-15% countertops, 15-20% appliances, 25-35% labor, 10-15% finishing details—creates cohesive results. Avoid cheap cabinets with luxury appliances or vice versa; maintain consistent quality throughout.
Ignoring Resale Implications: Personalizing kitchens with highly specific aesthetic choices appeals to limited buyer pools. If selling within five years, maintain broad appeal through neutral selections. Bold design statements like unusual colors, exotic materials, or very specific styles should be limited to easily changed elements or reserved for long-term ownership scenarios.
Material Selection Mistakes
Sacrificing Quality for Savings: Cheap cabinets with particleboard construction, thin doors, and poor hardware fail quickly requiring premature replacement. Quality materials cost more initially but provide better long-term value through durability, functionality, and appearance retention. View kitchen remodeling as long-term investment rather than expense to minimize, allocating budgets toward quality fundamentals.
Trendy Over Timeless: Bold color choices, trendy finishes, and fashionable materials feel dated quickly, creating regret and potentially requiring earlier replacement. Ultra-gray cabinets, barn doors, excessive open shelving, and other current trends will eventually feel as dated as 1980s oak and brass. Choose classic options with lasting appeal.
Mismatched Finishes: Coordinating cabinet finishes, hardware, faucets, light fixtures, and appliances creates cohesive designs. Mixing too many finishes—chrome faucet, oil-rubbed bronze hardware, stainless appliances, brass light fixtures—creates chaotic appearances lacking intentional design. Limit finish variety to 2-3 maximum, ensuring purposeful coordination.
Contractor and Timeline Mistakes
Inadequate Contractor Vetting: Hiring contractors based solely on lowest bids often leads to poor quality, incomplete work, or abandoned projects. Check references, verify licenses and insurance, review previous work photos, read online reviews, and obtain detailed written contracts. Pay attention to communication quality during bidding; contractors who don’t respond promptly or clearly now will create greater frustrations during construction.
No Written Contract: Verbal agreements create misunderstandings about scope, timeline, payment terms, and responsibilities. Insist on detailed written contracts specifying all work to be completed, materials to be used (specific brands and models), payment schedules tied to milestones, timeline expectations, and change order procedures. Contracts protect both parties from misunderstandings.
Unrealistic Timeline Expectations: Kitchen remodeling takes longer than anticipated. Plan for 8-12 weeks minimum from demolition to completion, understanding delays from material backorders, subcontractor scheduling, permit approvals, and unexpected issues are normal rather than exceptional. Create temporary kitchen setups with microwave, cooler, and paper products minimizing stress during construction.
Living in Construction Zones: Attempting normal life during major remodeling creates stress, dust migration, and safety concerns. If possible, schedule remodeling during vacations or when you can temporarily relocate. At minimum, seal construction areas from rest of homes with plastic barriers, establish dust mitigation protocols, and plan meals not requiring full kitchens.
Frequently Asked Questions About Kitchen Remodeling
How long does a typical kitchen remodel take?
Most kitchen remodels require 6-12 weeks from demolition through final completion, though timeline depends significantly on project scope and complexity. Minor cosmetic updates without layout changes can be completed in 3-4 weeks, while extensive remodels involving structural modifications, custom cabinetry with 12-week lead times, or significant plumbing and electrical relocations may extend 14-20 weeks. Budget additional 4-8 weeks for pre-construction planning including design development, material selection, contractor selection, and permit acquisition. The most significant timeline variable is typically cabinet lead time; stock cabinets are available immediately, semi-custom cabinets require 6-8 weeks, and fully custom cabinets need 10-14 weeks from order to delivery.
Several factors can extend timelines beyond initial estimates: material backorders particularly for appliances and specialty items, subcontractor scheduling conflicts especially during busy construction seasons, unexpected issues discovered during demolition like water damage or outdated wiring requiring remediation, permit approval delays in jurisdictions with backlogged building departments, and change orders as homeowners modify plans during construction. Build 2-3 week buffer time into your planning to accommodate inevitable delays without creating stress. Establish temporary kitchen facilities with microwave, cooler, and disposable serving items to maintain some meal preparation capability during construction.
What’s the best time of year to remodel a kitchen?
Kitchen remodeling can occur year-round, though certain seasons offer specific advantages. Late fall through early spring (November through March) represents slower periods for contractors in most regions, potentially providing better availability, more flexible scheduling, and possibly modest pricing discounts. However, heating costs increase when heating construction spaces with open exterior walls, and holiday seasons may create scheduling complications as contractors and homeowners prioritize family time.
Late spring through early fall (April through October) is busiest for contractors, potentially meaning longer waits for project starts and premium pricing, but warmer weather facilitates easier material deliveries, faster curing times for adhesives and finishes, and more comfortable working conditions. If your remodeling includes exterior door relocations or window changes, warm weather prevents uncomfortable temperature extremes during temporary openings.
Consider personal schedules when timing remodeling: many homeowners prefer completing projects before major holidays when family gatherings occur, while others choose summer months when children are home from school helping with temporary living arrangements. Tax refund season (spring) often motivates remodeling projects as funds become available. Ultimately, best timing depends more on contractor availability, your schedule flexibility, and financial readiness than specific seasons. Quality contractors stay busy year-round; don’t delay good projects waiting for “perfect” timing that may not meaningfully improve outcomes.
Should I remodel my kitchen before selling my house?
This decision depends on your kitchen’s current condition, local market expectations, your timeline, and available budget. Homes with severely outdated or dysfunctional kitchens benefit from pre-sale remodeling, as buyers either avoid such properties entirely or demand significant price reductions exceeding remodeling costs. However, extensive remodeling rarely returns full investment at immediate resale; expect recovering 60-75% of costs for well-executed projects.
Consider strategic minor updates rather than comprehensive remodels when selling soon: cabinet painting or refacing costs $3,000-$8,000 while providing significant visual refresh, new countertops without cabinet replacement cost $2,000-$5,000 updating key surfaces, updated hardware and lighting provide high impact for $500-$1,500, and fresh paint and thorough cleaning cost minimal amounts while dramatically improving first impressions. These targeted improvements often return investment more effectively than complete remodels by addressing visible deficiencies without excessive spending.
Consult local real estate agents familiar with your neighborhood’s typical buyer expectations. Some markets demand updated kitchens as baseline expectations, while others accept various kitchen conditions with price adjustments. Agents provide valuable perspective on whether remodeling will meaningfully affect sale price and timeline or whether your energy is better spent on other pre-sale preparations. If you decide to remodel before selling, choose neutral, broadly appealing design selections rather than personal preferences; your goal is attracting maximum buyers, not creating your dream kitchen you won’t enjoy.
How much should I spend on a kitchen remodel relative to my home’s value?
Kitchen remodeling investments should generally represent 10-15% of home value maximum, though this guideline flexes based on several factors. In $300,000 homes, this suggests $30,000-$45,000 budgets producing appropriate quality levels aligned with buyer expectations. Spending significantly more creates overimprovements unlikely to return investment at resale, while spending substantially less may produce quality mismatches with home’s overall character.
This percentage guideline serves homes in middle market ranges well; adjustments apply at extremes. In luxury properties exceeding $1 million, kitchen investments might appropriately represent 7-10% of value since high-end finishes don’t scale linearly with home prices. Conversely, modest homes under $150,000 might warrant kitchen investments approaching 15-20% of value since baseline quality costs remain relatively fixed regardless of home value; you can’t purchase half a kitchen or adequate cabinets for $7,500 simply because that’s 10% of a $75,000 home value.
Consider your ownership timeline when establishing budgets: homeowners planning 10+ year ownership before selling should weigh personal enjoyment more heavily than strict investment return calculations, potentially justifying higher expenditures. Those selling within 2-3 years should maintain conservative budgets aligned with immediate return expectations. Additionally, factor in whether your kitchen represents significant functional deficiency versus mere aesthetic preference; addressing genuine problems through remodeling creates more value than pursuing stylistic changes in functional spaces.
Neighborhood comparison provides valuable reality check: research recently sold homes in your area noting kitchen quality levels at various price points. If most $400,000 homes in your neighborhood feature $40,000-$60,000 kitchens, spending $120,000 on yours creates expectations mismatch. Conversely, installing $25,000 kitchen in same properties disappoints buyer expectations. Right-sizing investments to neighborhood norms produces better financial outcomes whether measured through increased buyer appeal or avoided overimprovement losses.
Can I live in my house during a kitchen remodel?
Yes, most homeowners remain in their homes during kitchen remodeling, though this decision involves significant inconvenience and careful planning. Successful in-home remodeling requires establishing temporary kitchen facilities, implementing dust containment measures, maintaining clear contractor access, and accepting disrupted daily routines for project duration.
Set up temporary kitchen space in another area—dining room, basement, or garage—with essential equipment: microwave for heating prepared foods, mini-refrigerator or cooler with ice for perishables, electric kettle or coffee maker for hot beverages, paper plates and disposable utensils minimizing washing needs, and small preparation area for simple meals. Stock non-perishable foods, plan restaurant meals more frequently than usual, and consider this temporary situation when grocery shopping.
Dust control becomes critical concern: seal construction area from living spaces using heavy plastic sheeting and painter’s tape, close HVAC vents in kitchen preventing dust circulation through home, establish negative air pressure if possible directing dust outside rather than into living areas, and run air purifiers in adjacent spaces capturing airborne particles. Even with precautions, expect fine dust throughout home; increase cleaning frequency during construction.
Maintain clear contractor access to kitchen, basement if plumbing or electrical work occurs there, and outdoor areas for material deliveries and debris removal. Establish morning arrival times, understand typical work hours, and plan your schedule around construction activities. Some homeowners prefer leaving homes during work hours to avoid noise and disruption, returning evenings after contractors depart.
Consider alternative housing if: you have young children whose safety and routines are difficult to maintain during construction, you have respiratory sensitivities or allergies aggravated by construction dust, you work from home requiring quiet environment that construction prevents, or your remodeling involves extended periods without functional bathrooms. Even one-week getaway during demolition and rough-in stages significantly reduces stress levels. Balance inconvenience costs against lodging expenses when deciding whether to remain home or temporarily relocate.
2026 Remodeling Cost Guide
Don’t get ripped off. See real pricing for bathrooms, kitchens, and HVAC.
Updated for 2026 Market Rates
FTC Disclosure: This article contains affiliate links to products we recommend. When you purchase through these links, we may receive a commission at no additional cost to you. We only recommend products we have researched and believe will benefit your kitchen remodeling project. All opinions and advice are our own. Thank you for supporting our work.
Related Resources for Kitchen Remodeling
For additional guidance on kitchen remodeling throughout Southern Ohio and Northern Kentucky, we recommend exploring these comprehensive resources from our educational library:
Kitchen Remodel ROI Southern Ohio – Market-specific return on investment analysis and recommendationsr Resources
Kitchen Remodeling Southern Ohio: Complete 2025 Guide – Comprehensive overview covering design principles, material selection, and project planning
Kitchen Layout Ideas for Small Spaces: Maximizing Every Square Foot – Strategic approaches for optimizing compact kitchen configurations
Kitchen Flooring Options and Costs in Southern Ohio: Complete 2026 Guide – Detailed comparison of flooring materials with regional pricing
Kitchen Cabinet Buying Guide Southern Ohio – Construction methods, material comparisons, and selection strategies
Granite vs. Quartz Countertops: Southern Ohio Guide – Side-by-side comparison helping material selection decisions
Kitchen Countertop Materials Comparison: A Complete Guide for Southern Ohio Homeowners – Comprehensive analysis of all countertop options

Author: Mike Warner
Mike Warner — Founder, Kore Komfort Solutions LLC U.S. Army veteran. 30 years in the trades — HVAC installation, kitchen and bathroom remodeling, and residential construction across Alaska, Washington, Colorado, Ohio, Kentucky, and Tennessee. I've pulled permits, managed crews, run service calls at midnight, and built a business from a single truck. Now I build the digital infrastructure that helps contractors compete and win. Kore Komfort Solutions exists for one reason: to give small and mid-size contractors ($2M–$10M) the same AI-powered tools, websites, and business systems that the big operations use — without the enterprise price tag or the learning curve. Through Kore Komfort Digital, we design and manage high-performance WordPress websites engineered to rank on Google and convert local searches into booked jobs. Through Rose — our AI-powered business management system currently in development — we're building the future of how contractors handle leads, scheduling, estimates, and customer communication. I write about what I know: the trades, the technology reshaping them, and how to build a contracting business that runs on systems instead of chaos. Every recommendation on this site comes from someone who's actually done the work — not a marketer who Googled it.